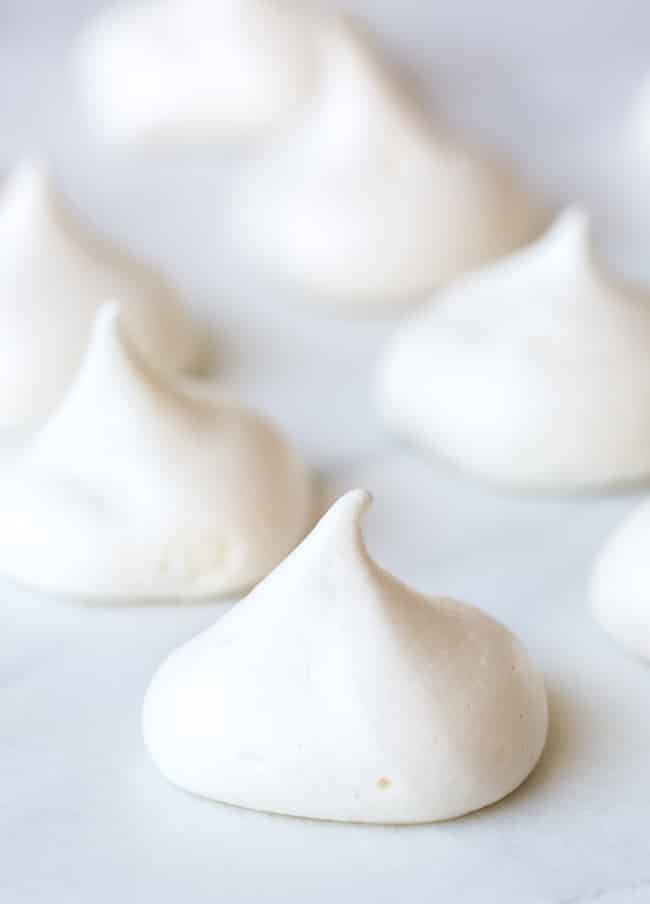
Learn how to make the best light and crispy Vegan Meringue kisses with whipped up aquafaba – only four ingredients needed to make these egg free, melt-in-your-mouth cookies!
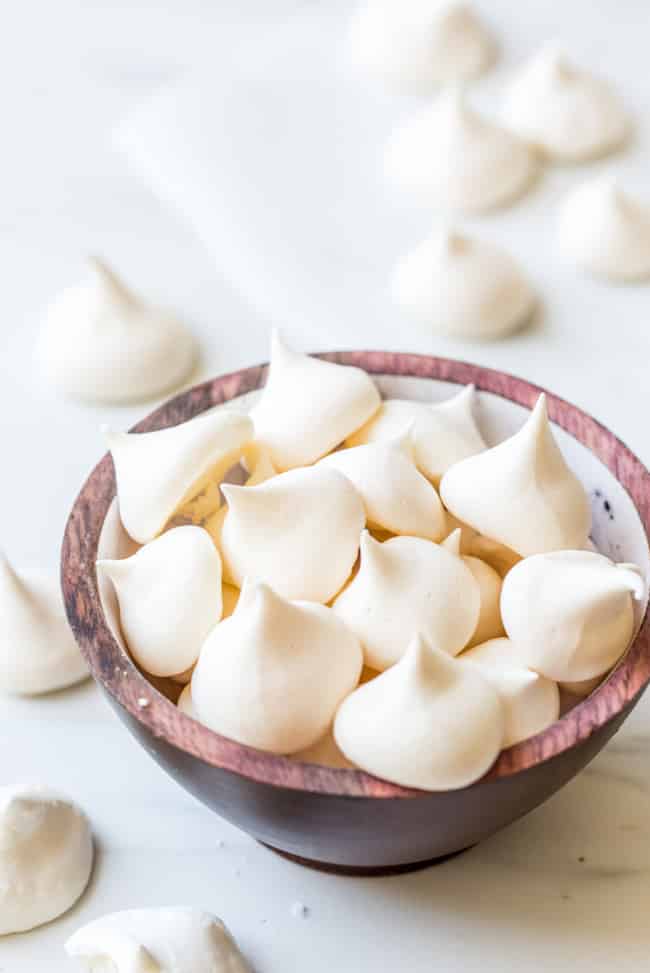
I’ve had a lot of vegan versions of foods over the years that have really impressed me in terms of how similar they have been to the real thing, but I think these aquafaba meringues take the cake.
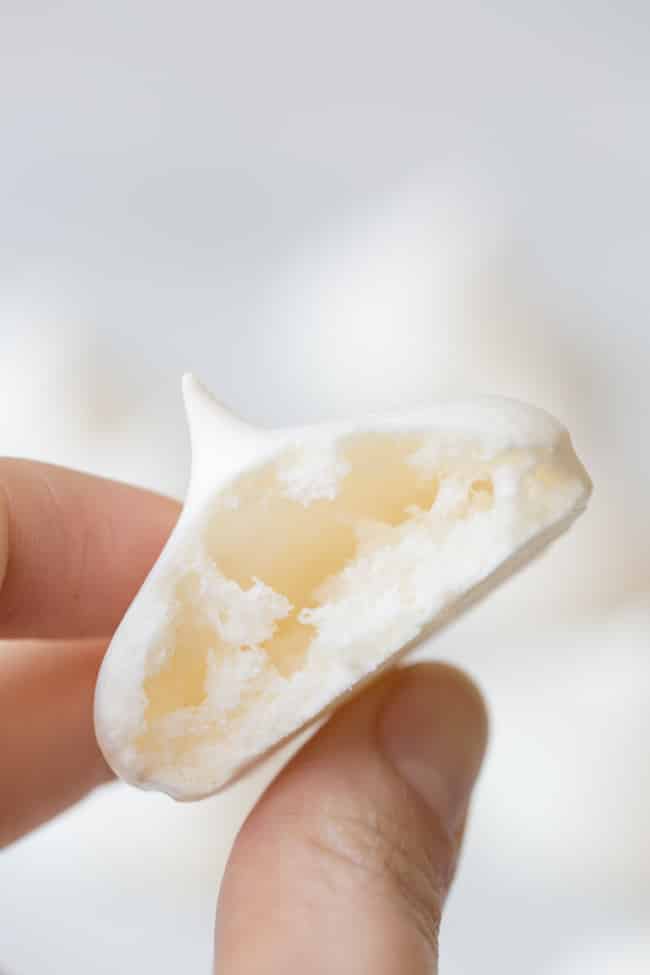
I honestly can’t get over how similar they are to real, egg white meringue in both taste and texture – especially when I remember that they’re made with what is essentially bean water.
So without further ado – let’s make meringue!
How to Make Vegan Meringue with Aquafaba
Really it just comes down to whipping up the aquafaba. It’s not hard but it might require a little patience to get the job done right. A few things to keep in mind when making this:
- Cream of tartar is important for stabilising the aquafaba as it whips up just as it would if you were using actual egg whites. It keeps your fluff from collapsing too quickly and it also helps keep your meringue shiny and bright. If you don’t have any cream of tartar on hand you can use a little bit of lemon juice for a similar effect.
- If possible, pop your aquafaba & mixing bowl in the fridge for at least 10 minutes before you begin mixing. I’ve found that the aquafaba whips up much easier when everything is cold to begin with.
- Be patient! These meringues are really easy to make so long as you don’t try to rush things!
Stage One
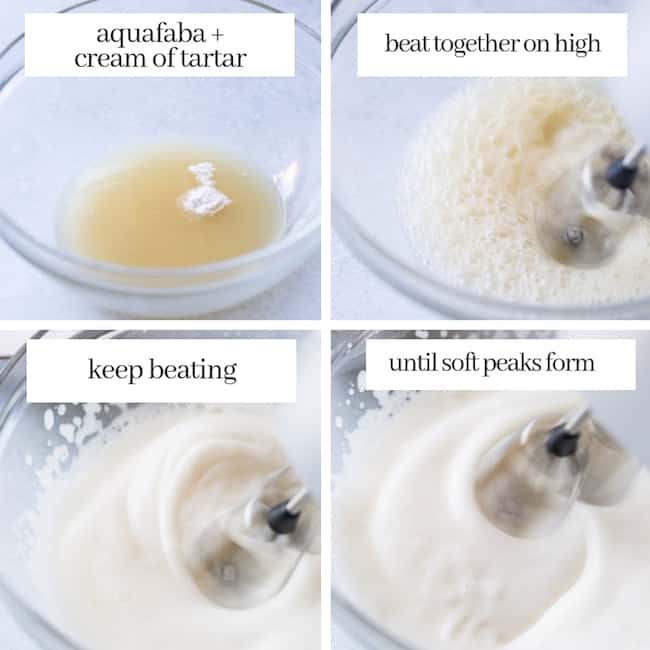
Start out by beating together your chickpea water and cream of tartar together in a large mixing bowl. Make sure you do use a large mixing bowl because your aquafaba will increase in volume by quite a bit.
Whip your aquafaba until soft and airy. This stage should only take a couple a minutes to get to.

Stage Two
Once you’ve whipped your aquafaba up into soft peaks you can begin adding the sugar 1 tablespoon at a time. If you add your sugar too quickly and all at once you will deflate your aquafaba and may struggle to whip it back up again.
Keep beating until stiff peaks form. Your meringue should be shiny and thick. You’re just about done at this point – just need to add in the final ingredient next.
Stage Three
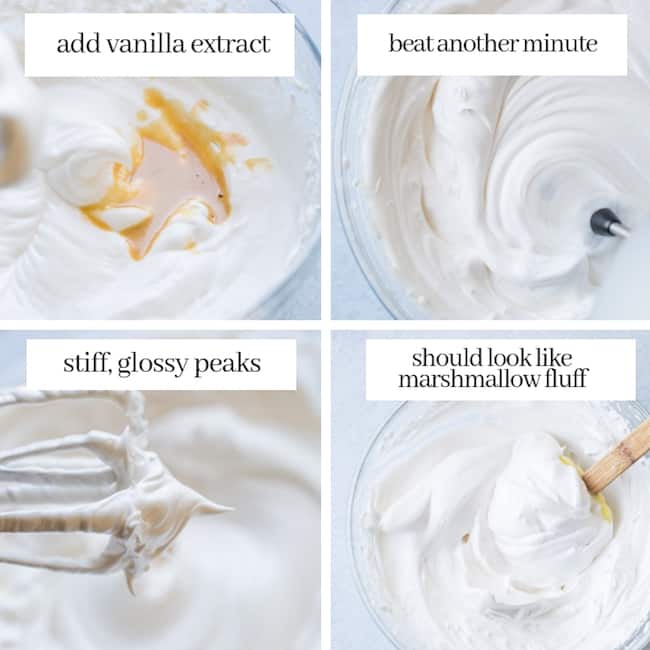
Next up: add the vanilla. You can skip the vanilla altogether if you’d like, but you might feel that your meringues are missing something without it.
Once you’ve added the vanilla, continue to beat your mixture together another minute to fully incorporate it. When you’re ready to move on to piping, your meringue should look like marshmallow fluff.
Stage Four
If you haven’t already, now is the time to preheat the oven and line the baking sheets with baking paper.
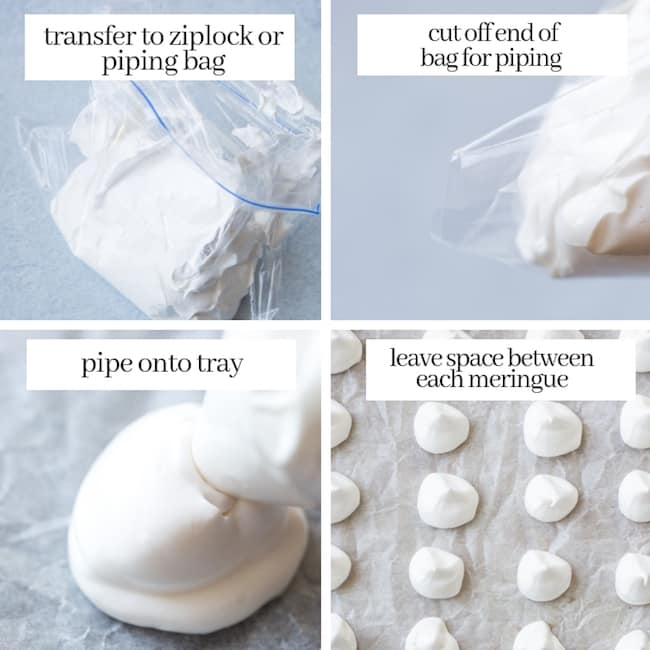
Carefully spoon your meringue mixture into a large ziplock bag or pipping bag. If using a ziplock bag, cut the corner of the bag off – make a hole large enough to pipe your meringue.
Hold the bag perpendicular to your lined baking sheets and gently squeeze out a dollop of meringue on to your sheet, lifting up as you do. Continue piping until you’ve filled up your baking sheets. This recipe makes about 80-100 depending on how large you make your meringues so you will easily fill up 2-3 baking sheets.
Make sure you leave a little room in between each dollop. You don’t need much room because these shouldn’t spread much as they bake, but you don’t want them so close that you run the risk of them sticking together.
When you’re ready to go, place the baking trays in the oven and bake low and slow for about 90 minutes until firm and dry. Turn off the oven and let the meringues sit for about 15-20 minutes before removing and that’s it!
Final Vegan Meringue Tips & Questions
How Long do these Vegan Meringues last?
- If stored in a dry, airtight container or environment you can keep these up to five or six days.
If left in a humid environment these will start to go sticky pretty quickly so it’s best to keep these in the fridge for freshness. - You can rectify sticky cookies by popping them back in the oven for about 20-30 minutes to dry out again if needed.
Why isn’t my aquafaba fluffing up?
- The equipment wasn’t dry enough. Mixing bowls, whisks and mixers need to be clean and dry. Even a little bit of water/oil can be enough to prevent these from fluffing up.
- You’re not beating hard or long enough. Sometimes my aquafaba will whip up perfectly in about 5 minutes and sometimes it takes a little bit longer. If you’re using an electric or stand mixer it should whip up within about 10 minutes.
- It’s unfortunate, but sometimes you can just end up with dud bean water. You may just need to grab a new can and start again.
Can I use alternative sweeteners?
- At your own risk. I’ve successfully used coconut sugar though it did turn my meringues light brown and they came out more grainy.
- Sugar substitutes like erythritol, xylitol, stevia, etc won’t work.
Can I whip this by hand?
- Yes but it will take a LOT of time and arm strength. If you have the option to use an electric or stand mixer save yourself the trouble. If it’s not an option it can be done but you’ll need to work at it for much longer and you might not get to truly fluffy, stiff peaks at the end.
And that’s it! If you have any more questions about making these vegan meringues please let me in the comments below!
FACEBOOK | INSTAGRAM | PINTEREST
Don’t forget to #asaucykitchen on instagram if you try this Aquafaba Vegan Meringue! I’d love to see what you make with it! You can also post your pictures to my facebook page!

Aquafaba Vegan Meringue
Learn how to make these light and crispy Vegan Meringue kisses made with whipped up aquafaba -only four ingredients needed to make these egg free, melt-in-your-mouth cookies!
Ingredients
- 1/2 cup | 120 ml aquafaba (unsalted chickpea water)
- 1/4 teaspoon cream of tartar
- 1/2 cup| 100 g white granulated sugar (sugar substitutes will not work here)
- 1/2 teaspoon vanilla extract
Instructions
- Preheat the oven to 210°F/100°C. Line 2-3 large baking sheest with baking paper and set aside.
- Add the aquafaba and cream of tartar to a large mixing bowl (ideally one that has been chilling in the fridge for at least 10 minutes).
- Use electric beaters or a stand mixer to beat the aquafaba on high until soft peaks form.
- Gradually begin adding the sugar 1 tablespoon at a time until stiff, gloss peaks form. This can take anywhere from 5-15 minutes depending on the quality of the aquafaba (though usually 10 minutes will be the sweet spot). Just keep beating and scraping down the sides until the aquafaba has at least tripled in volume and stiff peaks form. Your aquafaba should be beaten and stiffened up so much that if you flip your bowl upside down it stays in place or the aquafaba sticks to the beaters when lifted up.
- Add the vanilla extract and beat for another minute to fully incorporate.
- Spoon the meringue mixture into a large, clean ziplock bag. Cut the corner of the bag off for piping. Hold the bag over the lined baking tray and carefully pipe out small blobs about 1 1/2 inches thick in diameter onto the trays. Leave about an inch of space in between the meringue so they don't stick when baking. Continue piping until all of your baking sheets have been filled.
- Place in the oven for about 90 minutes until the meringues have hardened. Meringues higher in the oven will cook better/faster so if you need to you can switch up your baking sheets positions in the oven about halfway through. When you can easily pull a meringue up off the baking paper without it sticking in the middle you're done. Turn off the oven and keep the meringues in with the door shut another 15-20 minutes to dry out even more.
- Remove from the oven and let finish cooling on the baking sheet and enjoy!
Notes
How Long Do These Keep
- If stored in a dry, airtight container or environment you can keep these up to five or six days.
- If left in a humid environment these will start to go sticky pretty quickly so keep these in the fridge for freshness.
- You can rectify sticky cookies by popping them back in the oven for about 20-30 minutes to dry out again if needed.
Other Tips
- Make sure to use dry, clean bowls with no traces of water or grease. Even the smallest amount of oil can contaminate the aquafaba and prevent it from whipping up fully.
- If you don't have any cream of tartar you can use 3/4 teaspoon lemon juice in place. This will help make the whipped up aquafaba more sturdy.
- Keep in mind that the bigger you make your meringue kisses the longer they will need to cook.





Helen says
Hi Sarah,
I tried your original recipe and it works well and tastes great! I then tried to experiment with gel food colouring (trying to make Christmas trees) and unfortunately the texture did not hold and they fell apart. Do you have any advice on how to colour them successfully?
Sarah Nevins says
Hi Helen! Thank your asking – that’s really helpful to know about the gel food coloring!
I think the added moisture from the gel is what threw things off. I haven’t tried it with powdered food coloring, but I do think it would work much better here. There are two types of powdered color: one to add before baking and one that you use to dust the meringues at the end (usually this one has adds a shimmer effect)
If you don’t mind the flavor, you can also try powdered matcha (2-3 teaspoons). The color isn’t very vibrant, but it will add a green hue.
Hope this helps!
Polly says
Hi Sarah,
I made aquafaba meringues for the first time yesterday, using your recipe. Your recipe worked well (although my ‘meringues’ took around 2.5-3 hours of baking at 100 degrees C!). They have remained crispy overnight in sealed food tubs. They also look very nearly like the real thing (i.e. egg meringues). Unfortunately, the downfall is in their taste, which is odd and bitter to my tastebuds. I wondered if I’d accidentally used salted chickpea water, but I checked the can and this wasn’t the case.
This is not a reflection on your recipe, but I suspect that vegan meringues are an acquired taste! Interesting to try, but I’ll be reverting to my usual egg white version from now on 🙂
Sarah Nevins says
Hi Polly! Thanks so much for the feedback! Having made these a few times now that flavor you’re talking about is definitely more noticeable some times and not others. It’s good for me to keep in mind to play around with more!
Lori says
So easy and delicious. My friend who is allergic to eggs truly appreciated a dessert she could eat that tasted yummy. Thanks!
Sarah Nevins says
Yay! I’m so glad you guys were able to enjoy these! Thank you so much for taking the time to come back and let me know how it went 🙂
Amber says
I used substitute sugar. I used white bean juice they ran togather ( 3 of em) but praying to the angels it will still be kisses 🥰
Sarah Nevins says
Fingers crossed for you! I’ve done this using white beans as well so it really should work!
Kate says
Hi! You mentioned that you could sub cream of tartar with lemon juice. How much lemon juice? And will it be as successful or is it worth making the trip to the shops quickly?
Thank you 🙂
Sarah Nevins says
Hi Kate! I wouldn’t bother making a special trip to the store for cream of tartar – lemon juice (white vinegar too) is a great sub when it comes to meringue! Instead of the 1/4 teaspoon cream of tartar you’ll just need 1/2 teaspoon lemon juice. Hope that helps!