Make the most of berry season with these homemade Strawberry Hand Pies! Made with my tried & tested, flaky gluten free pie crust and filled with a simple strawberry compote you’ll fall more in love with every bite! It’s like a healthier homemade pop tart without all the added junk! | Gluten Free + Low FODMAP
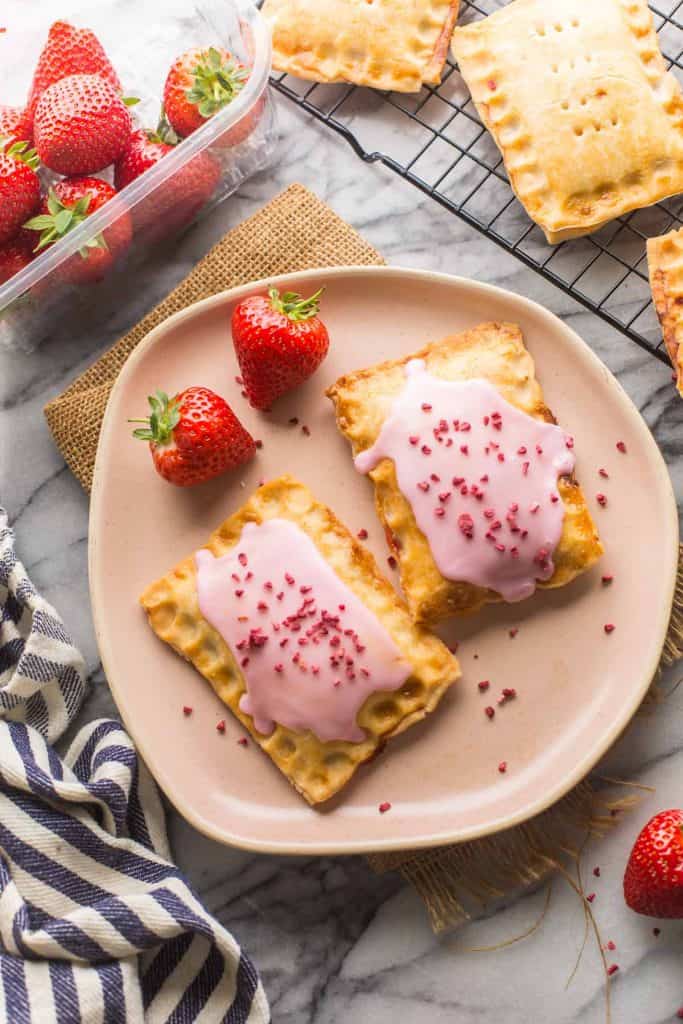
Originally posted March 14, 2016 – Updated pictures post and recipe May 14, 2021 with an improved recipe, photos new photos and tips for success.
Today I’m sprucing up and bringing back an oldie but a goodie with these gluten free strawberry hands pies! It’s been about five years since I last gave this recipe some love so it seemed like a good to dust off the crumbs and swap out the old with new pics, tips and an updated recipe that includes more options for subs and tweaks. So let’s get going!
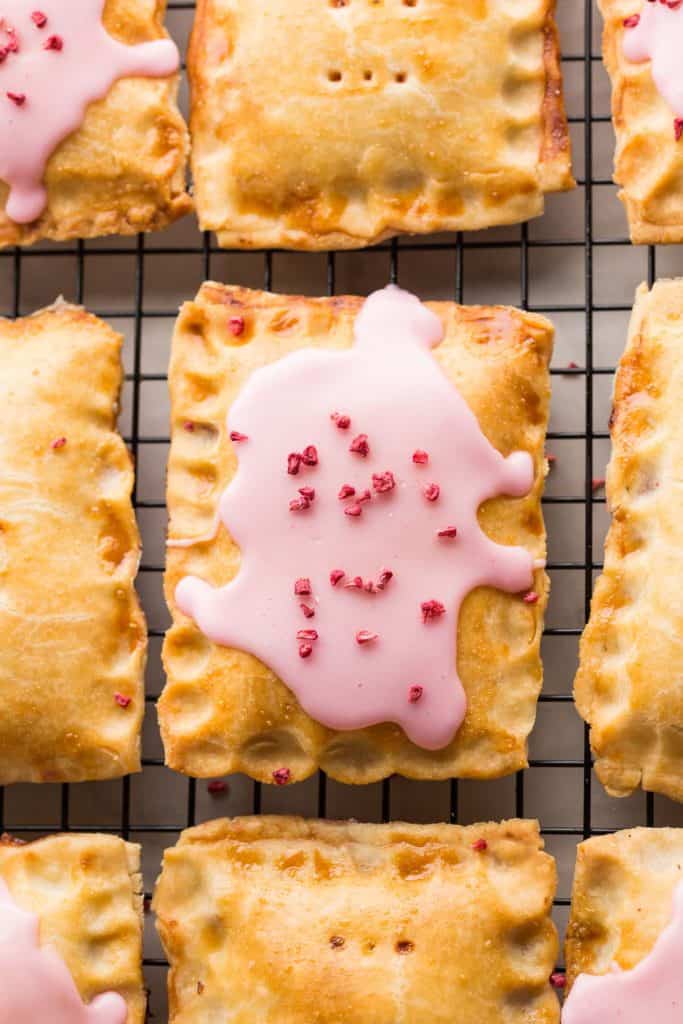
The Gluten Free Pie Dough
I’m not going to go too deep on the pastry prep here. The recipe includes step-by-step instructions, but if you need a more of an in depth walkthrough with more visual help then make sure you check out my Flaky Gluten Free Pie Crust Recipe. That recipe is filled with plenty of tips, Q&A’s and plenty of pictures to guide you through it.
Can I use store bought gluten free pastry dough instead? Absolutely! If you happen live in the UK I can recommend the Jus Rol gf puff pastry roll here. I’ve used it plenty of times when I can’t be bothered with making my own crust.
Strawberry Filling
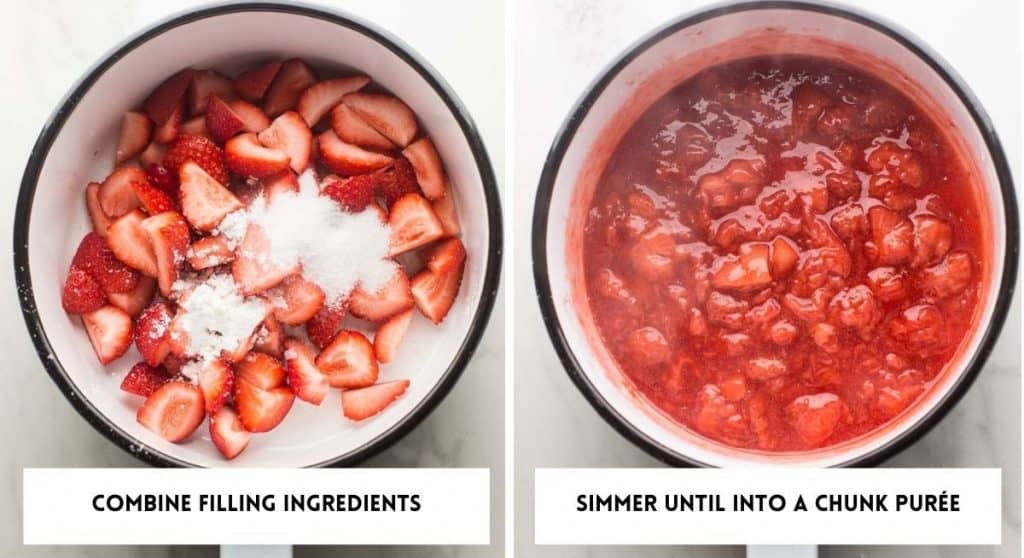
The strawberry filling is insanely easy to make – it’s simply just a matter of combing that strawberries, sweetener, lemon juice and cornstarch together in a sauce pot and simmering over a medium-low heat until the fruit breaks down and the mixture thickens.
Once cooked, transfer the filling to another bowl and set aside to cool completely before using. Make sure the filling has cooled enough before add it to the dough because the heat will melt the butter in your pastry which will make for crumbly hand pies.
A Few Quick Filling Tips & Subs
- White Sugar >>> Pretty much any other sweetener: If for whatever reason you don’t want to use white sugar you can swap it out with coconut sugar (that’s what my original recipe used), brown sugar, maple syrup, honey or agave.
- Strawberries >>> Any other berry: You can use blueberries, raspberries, blackberries or a mixture of them all in place of the strawberries. It’s up to you!
- Cornstarch >>> Arrowroot, tapioca or potato starch. Arrowroot and tapioca starch need to be doubled if using (so use 2 teaspoons in place of 1) but potato starch can be swapped out 1:1.
- TIP: The smaller you chop your berries the faster the strawberry mixture with break down.
How to Cut the Dough
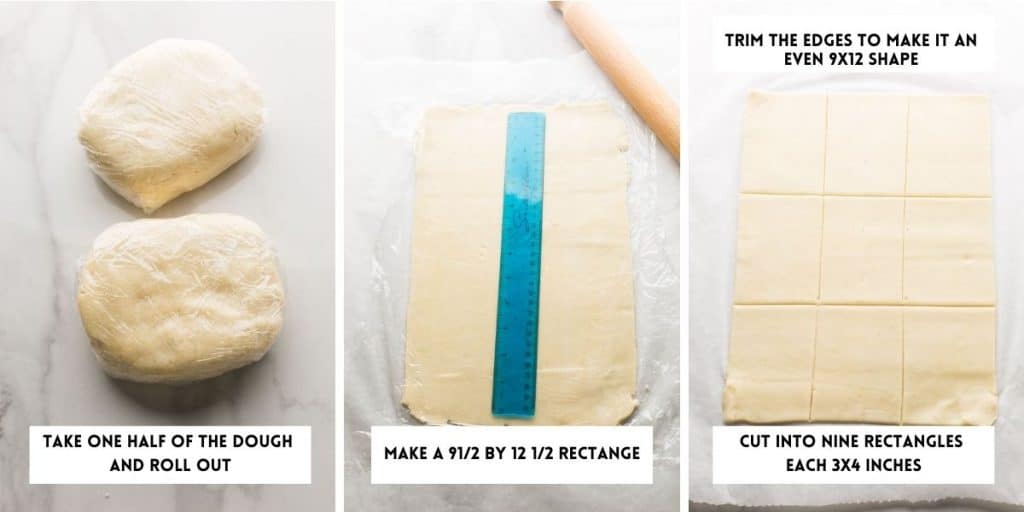
- Thaw. Let the dough sit at room temperature for about 10 minutes if it’s feeling too hard to roll out fresh out of the fridge.
- Roll. One at a time, use a rolling pie to roll out the dough on a parchemnt paper lined work surface. Roll the dough out into a large rectangle-like shape, about 9 1/2 wide and 12 1/2 inches long. It should be about 1/8 inch thick.
- Trim. To make even pies, trim the rough edges of the dough to make an even 9×12 inch rectangle.
- Cut into pieces. Cut the dough into nine equal rectangles, each 3×4 inches.
- Repeat. Roll, trim and cut the second half of the dough just as you did for the first half.
Strawberry Hand Pie Assembly
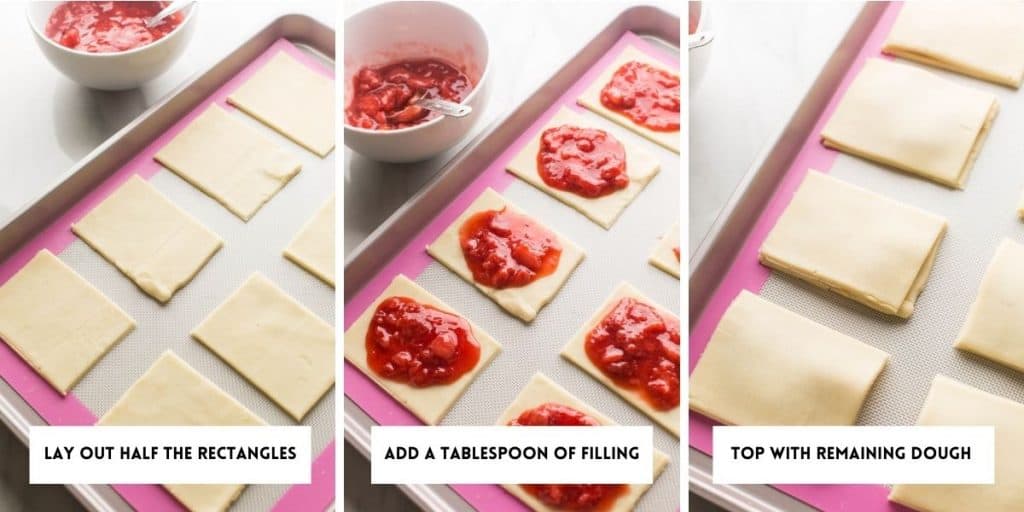
- Bottom half: Transfer nine of the dough rectangles to a a couple of lined baking sheet.
- Add the filling: Add about heaping tablespoon of the strawberry filling to the centre of each dough piece. Try to keep the filling towards the centre of the dough. The less the filling spill out the sides, the better.
- Top half: Add the remaining dough pieces to the top of the filling and carefully line up all the edges.
Seal & Vent
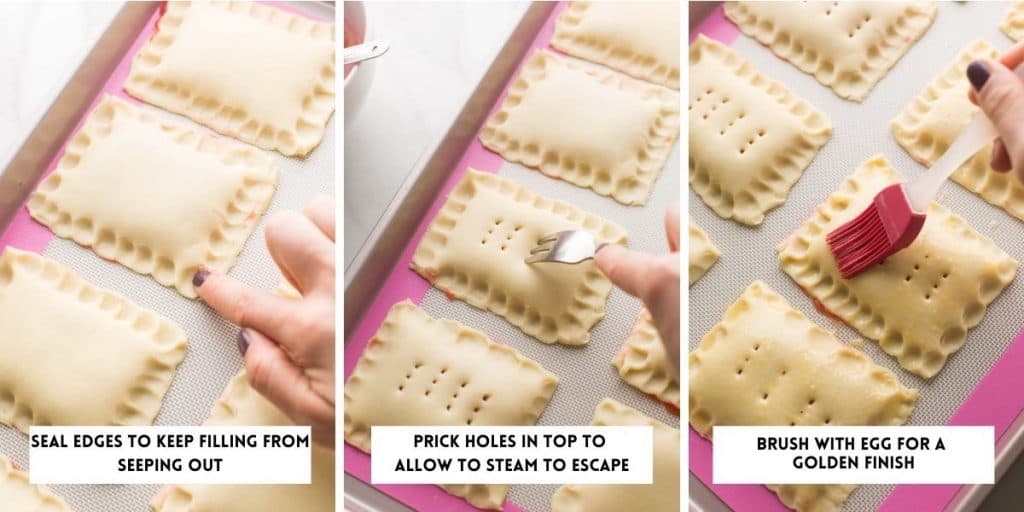
- Crimp: To keep the filling from seeping out of the sides of the pop tarts as they bake you need to seal the edges by crimping them closed. You can use a fork or your fingers to press edges of the dough together.
- Vent: Use the tines of a fork or a knife to prick/slice air vents into the tops of the pies. This will allow air with in the pop tarts to escape in a controlled way as they bake up.
- Egg Wash: With a pastry brush, brush some whisked egg over the top of each hand pie. This will make for a golden brown finish and help seal the edges together.
- Chill: Transfer the baking sheet to the fridge and chill, uncovered about 30 minutes before baking. After all of the handling, the butter/fat in the dough will be warm and a little melty. Chilling the dough at this stage helps firm up all the fat in the dough which will make for a flakier pie crust.
- TIP: If you don’t want to frost your hand pies later you can always sprinkle a bit of turbinado sugar over the top at this stage. The big sugar crystals will add a lovely crunch and an extra layer of subtle sweetness.
Final Touches
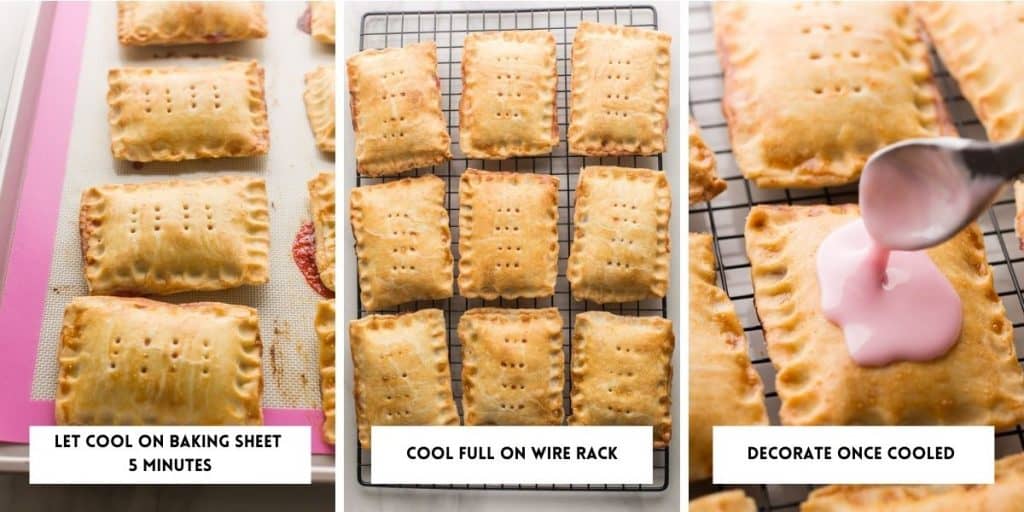
- Bake: Bake for about 30 minutes until the tops and edges are golden brown.
- Cool: Let the hand pies cool on the baking sheet for a few minutes, then transfer them to a wire cooling rack to fully cool.
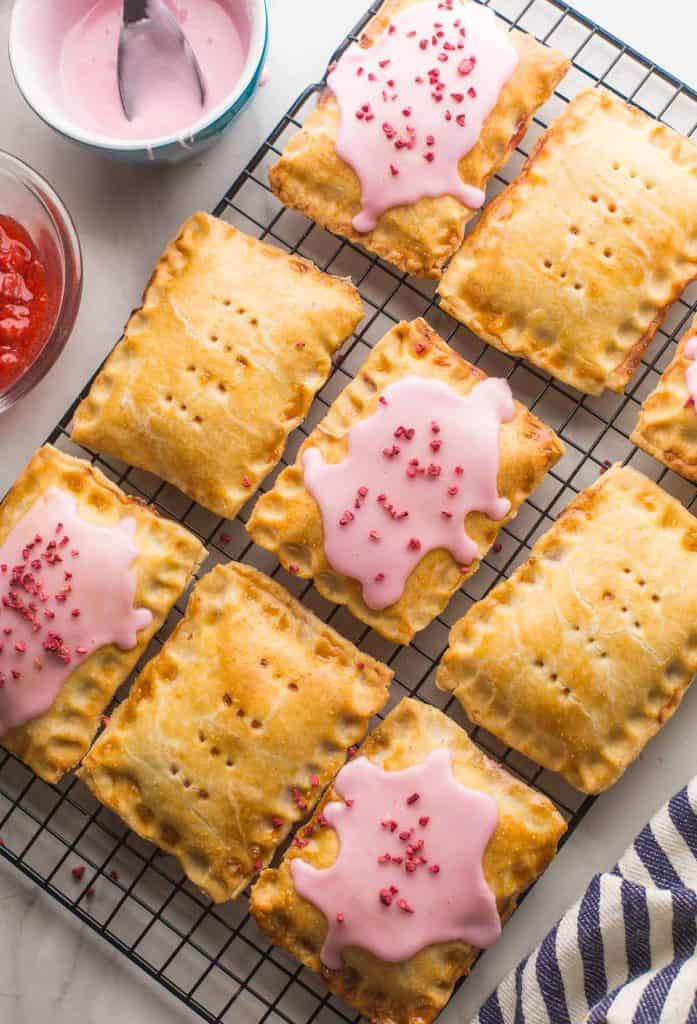
- Decorate: Once cooled completely you can frost and decorate as you like. The glaze is made up of a simple icing sugar and milk mixture. I added a drop of natural pink food colouring to mine and sprinkled some dehydrated strawberry crumbs over the top.
- TIP: Instead of topping these strawberry hand pies with glaze, spread a bit of nutella over the top for an even more decadent sweet treat!
Quick Questions
- Can I use store bought jam for the filling? Yes! Save on time by using your favourite jam in place of the strawberry filling listed here. It doesn’t even have to be strawberry – apricot, plum? Go nuts!
- Can I make this recipe egg free? Yes. Without the egg binding the dough together it won’t be as easy to handle and might break a bit more as you roll, but it will still work! I include tips to make this egg free in the recipe notes so make sure to check that out if you need.
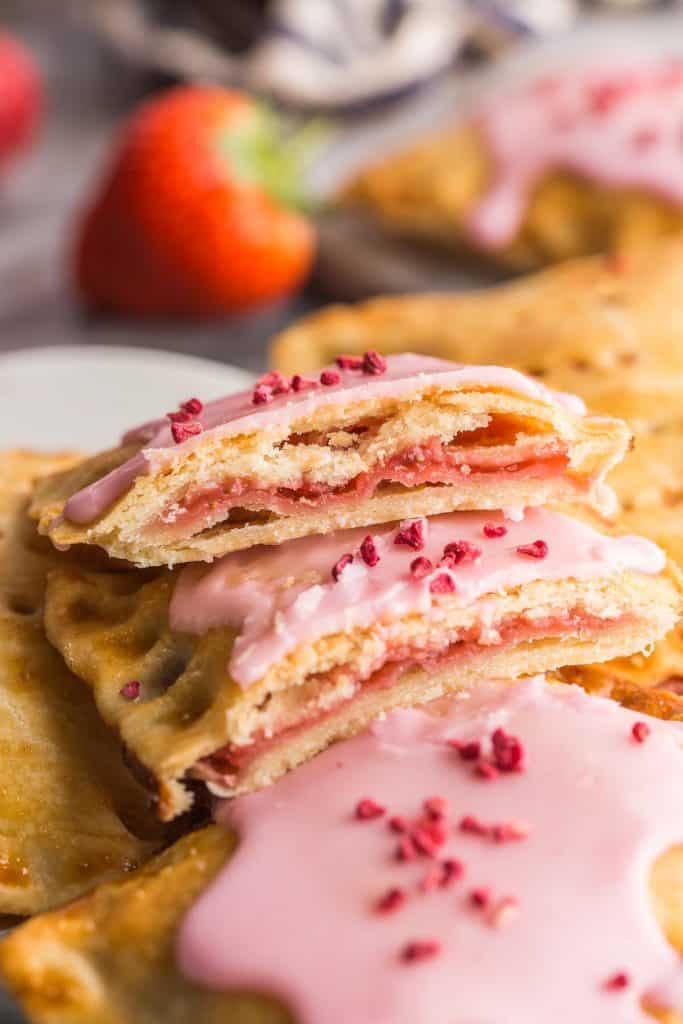
Make Ahead, Leftovers and Storage Tips
- Make the dough ahead of time: To cut down on time the day of you can prep your dough two days ahead of time. After dividing the dough into two portions, wrap up each piece well and keep in the fridge until you’re ready to use it. Let the dough sit at room temp for about 10-15 before attempting to roll it out if it’s too hard at first.
- Store un-iced hand pies: Once completely cooled, store in an air-tight container and keep at room temperature or the fridge for up to a week.
- Stored iced strawberry hand pies: These will keep for about 3-5 days in an airtight container in the fridge.
- Freeze for later: Once completely cooled, wrap each pie in a small piece of baking paper, then store in a freezer sage bag or container. The baking paper will help keep the pop tarts from freezing together. If you know you want to freeze leftover pop tarts, I recommend not icing them before freezing. This way, if you reheat them in the toaster, oven or microwave your icing won’t melt into the pastry.
FACEBOOK | INSTAGRAM | PINTEREST
Don’t forget to #asaucykitchen on instagram if you try these Strawberry Gluten Free Pop Tarts! I love seeing what you make! You can also post your pictures to my facebook page!
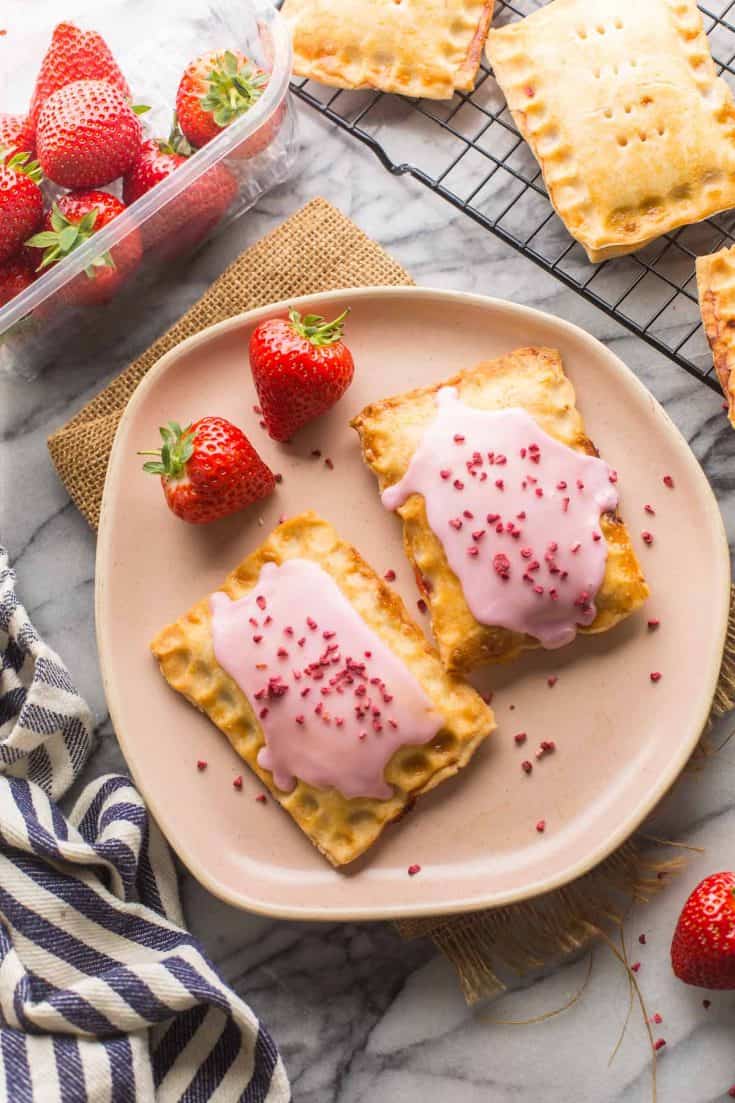
Gluten Free Strawberry Hand Pies (Pop Tarts)
Made with my tried & tested, flaky gluten free pie crust and filled with a simple strawberry compote you'll fall more in love with every bite! It's like a healthier homemade pop tart without all the added junk! | Gluten Free + Low FODMAP
Ingredients
Pie Crust
- 2 1/2 cup | 350 g gluten free all purpose flour blend (homemade or store bought)
- 1 tablespoon white caster sugar
- 1 1/4 teaspoon xanthan gum or guar (omit if your flour blend already contains xanthan)
- 1/2 teaspoon sea salt
- 2 whisked eggs, divided
- 2/3 cup| 150 g cold butter (vegan butter, shortening, palm shortening or coconut oil all work - see notes), cut into cubes
- 4-5 | 6-75 ml tablespoons ice cold water
Strawberry Filling
- 2 cups | 300 g strawberries, stems removed & diced
- 2 tablespoons | 25 g white granulated sugar
- 1 teaspoon lemon juice
- 1 teaspoon corn starch
- Optional Glaze & Toppings
- 1 cup | 125 grams powdered sugar
- 1 tablespoon milk (any type, dairy or non dairy)
- 2 tablespoons gluten free sprinkles or dehydrated strawberry crumbs
Instructions
Pastry Crust
- In a large mixing bowl whisk together the flour, xanthan gum, sugar and salt.
- Add the cold butter (or butter sub) and mix together with a fork or pastry cutter. Mix until you have a sandy kind of mixture. Stir in one egg.
- Mix in the water 1 tablespoon at a time. Add water until you form a dough that sticks together in a ball.
- Divide dough in half - each half should weigh about 300 grams. Form each half into rectangles. Wrap tightly in plastic wrap and refrigerate the dough while you prep the filling. Chill in the fridge at least 30 minutes
Filling
- Add the strawberries, sugar, lemon juice and starch to a small or medium sauce pot. Warm over a medium-high heat, about 5-10 minutes until the fruit has broken down and the mixture thickens. Use a wooden spoon to mix and mash the fruit as it cooks.
- Remove the pot from the heat. Transfer the filling to another bowl to cool down quicker and set aside until cool.
Pop Tart Assembly
- Preheat oven to 400°F/205°C. Line a couple of baking sheets with baking paper or silicon baking mats and set aside.
- Take dough out of the fridge. Place one half of dough on a lightly floured surface, and roll it into a large rectangle (9" x 12"). Trim the edges to make them straight. Cut the dough into nine rectangles (3" x 4") . Repeat with the second half of dough.
- Divide the filling between nine rectangles adding about a tablespoon to each rectangle. Try to keep the filling mostly towards the centre of the dough to prevent it from spilling out of the sides.
- Place the remaining nine pieces of dough over the strawberry topped rectangles. Crimp the edges with a fork or your fingers to seal the edges. Use a fork to prick holes on top of the dough. Place in the fridge for about 30 minutes to chill the dough one more time.
- Just before baking, brush the remaining egg over the top of each pop tart. Place in the oven and baking for 30-32 minutes until the edges are golden brown. Remove from the oven and let the pop tarts cool on the pan for a few minutes. Then transfer to a wire cooling rack to finish cooling.
Optional Glaze
- Mix the icing sugar and milk together in a small bowl. Add a drop of food colouring if desired. Whisk until a thick frosting forms. For a thinner glaze, add a splash of more milk until you get the desired consistency.
- Once the pop tarts have completely cooling, drizzle a little frosting over the top. Add sprinkles to the glaze when it's still wet. Within about 15 minutes the glaze should set and that's it!
Notes
- For an extra flaky crust sse butter & shortening. Use a combo of half butter/half shortening (1/3 cup each). Shortening has a higher steam point than butter which makes it nice and flaky but butter adds a better flavour.
- Make it egg free: Omit the egg in the dough. You will nee to add more cold water to make up for the missing moisture. Instead of 4-5 tablespoons add 1/2 cup (120 ml) ice cold water. Mix until a soft dough comes together. If the dough still feels too dry add more water 1 tablespoon at a time until if feels right.
- Instead of brushing the pies with an egg wash before baking you can skip the egg wash or brush a little milk (can be dairy free) over the top.
- If your pie crust dough is still feeling too dry after 4-5 tablespoons don't be afraid to add more water 1 tablespoon at a time until it comes together.




Bethany says
These pies are so cute, and they look delicious!
Sarah says
Thanks Bethany!
Leslie says
These, these are my weakness! I’m starting a clean eating sweep on Monday & I’m so sad, I can’t have things like this all month. So sad. It looks tasty!
Sarah says
Good for you! Your body will thank you for the clean eating sweep 🙂
Heather @ Country Life, City Wife says
These are just beautiful. I saw the photo in the SITS Sharefest Link up and *drool* LOL. The crust does intimidate me a little, but I SO have to try these. Strawberries with lemon? Sign me up!
Sarah says
Thank you Heather! I completely understand! I was so intimidated by making a gluten/dairy free crust at first, but now it’s one of my favorite things to make. Hope you like it – let me know if you have any questions 🙂
Ilka says
These little hand pies look outrageously yummy! Pinning and stumbling for you:):)
Sarah says
Thanks Ilka! 🙂
Bethany @ athletic avocado says
These hand pies are BEAUTIFUL! I tried to make hand pies last year, but I didn’t quite master them with GF flour! I would love to try again with this recipe!
Sarah says
Thanks Bethany! Let me know how it goes if you try them! Hopefully the video near the bottom helps – I know that working with a dairy free/gluten free crust can be tricky to work with so I thought I’d make one to go along with it.
Michelle @ Feed Your Skull says
These look out of this world amazing!! I know the temper tantrum feeling and kudos to you for sticking with it. The crust and these hand pies sound delicious ?
Sarah says
Thanks Michelle! Oh the stuggles…!
Angela says
These look wonderful! So fresh & healthy & I love that you used Coconut Oil, Pinned 🙂
Sarah says
Thanks Angela! I looove working with coconut oil – hands down my favorite dairy substitute!
Sarah says
Yours look soo good! You can’t go wrong with strawberries and lemon!
Kylee @KyleeCooks.com says
Any time you want to send me some of those for …. sampling… I’ll be willing!
Sarah says
I wish! The day we can start sending food via world wide web with friends is the day I gain 500 pounds lol
Dini @ The Flavor Bender says
These are awesome Sarah!! Perfect for Pie day 😀 I could have definitely snacked on these all day long!
Sarah says
You and me both 😉 Thanks Dini!