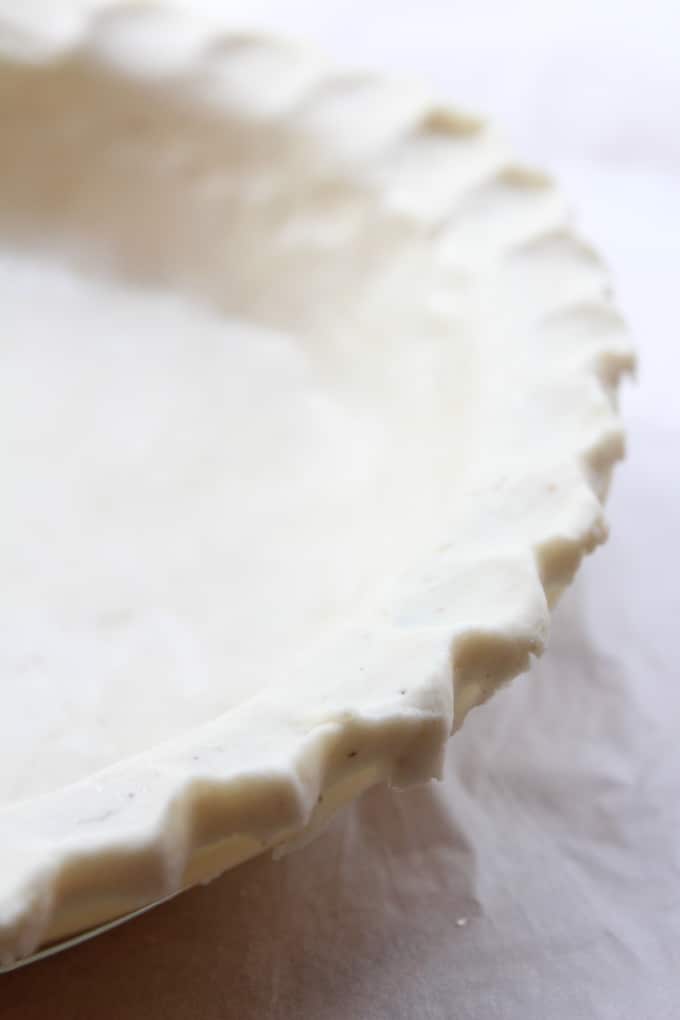
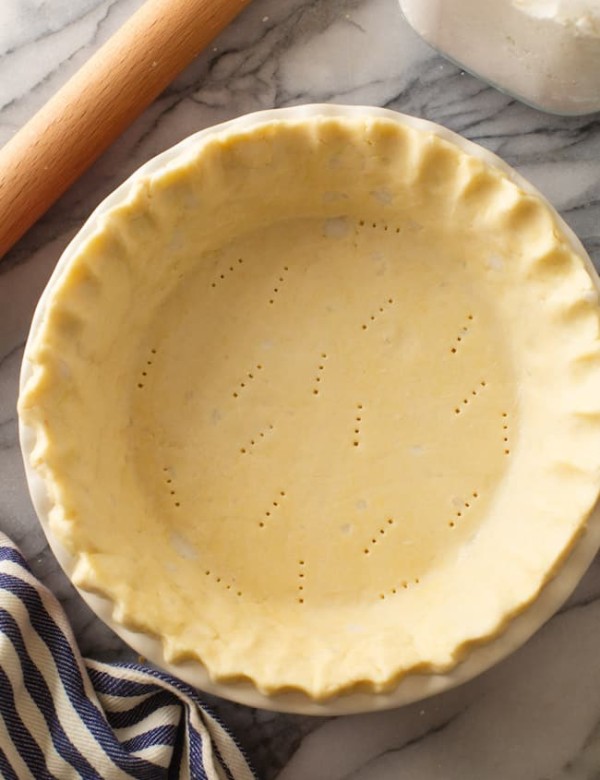
Gluten free coconut oil pie crust – only five ingredients needed to make this tender, flaky pie crust that’s completely dairy & nut free.
Ok so full disclosure: I love dairy. I love butter. I love cheese. I love cream in my coffee. However I am married to a man that seems to be more on the lactose intolerant side. For the most part Mike likes to completely avoid dairy, but every now and then he’ll indulge in a pizza or something. I both love and hate that fact because it means that I end up eating and cooking with a lot less cheese than I’d like, but that’s probably also a blessing in disguise.
Alright now we can begin.
I’ve spent the past several days destroying our kitchen trying to get this sucker right. I hate thinking of how much coconut oil I went through in the process, but that’s just the price you pay to make sure you get a recipe right. Just don’t tell Mike that. The first pie crust I made was terrible. Like, I’m not even kidding, truly and completely t e r r i b l e . You could throw the crust across the room and it still wouldn’t break it was that hard.
In the end it was more than worth it because this crust is flaky, tender, and so much easier than you might think. Once I got the fat to flour ratio right it was easy as….pie. (Sorry, I had to.)
I noticed that most coconut oil pie crusts that I could find out there on the web were one of three things. They were either:
- a regular gluten containing pie crust that used coconut oil, which doesn’t take into account the extra struggles that revolve around gluten free baking
- a paleo pie crust that used a ton of nut flours which can be both expensive and impossible for people with nut allergies
- a coconut oil/butter fat-combination which defeated the purpose of searching for a dairy free pie crust
As someone who is more than familiar with just how much of a total b**** food intolerances are I wanted to make a pie crust that was gluten, dairy, nut, and egg free. And thus my quest for a gluten free coconut oil pie crust began…
But before I get any farther, we need to talk about the whole cups vs weighing thing when it comes to baking. Everyone outside of America probably already knows this because I’m pretty sure the US is the only major country that doesn’t use the metric system, but I gotta mention it.
I think there are a lot of times when we can get away with measuring with cups without too much issue. However, if there was ever a time that you followed a recipe to the T and for some unknown reason your cookies still came out flat it’s probably because somewhere along the line your measurements got funky. It’s cool – we’ve all been there. It’s so easy to do because there are so many things to consider: Did you scoop the flour out or did you spoon it into the measuring cup? Was that brown sugar packed in? Are you sifting your flour? Are you using tapioca flour or coconut flour because you know that a cup of each doesn’t weight the same. Truth is, if you want complete accuracy in baking, especially gluten free baking, you need to do yourself a favor and buy a kitchen scale.
Truth be told, it took me months before I got around to using my kitchen scale. After I first moved to the UK I went out and bought myself a scale because I knew that’s how people did it here, but up until recently I’ve still had the American mindset of measuring in cups and then converting to grams.
It wasn’t really until I was testing and researching how to make the perfect gluten free coconut oil pie crust that I had this ah-ha moment about the scales. Depending on where you look, how you measure 1 cup of flour can weigh anything from 120 grams to 150 grams. Seriously, I looked. If you don’t have access to a kitchen scale yet, or you just can’t give up your cups, just know that from now on 1 cup of all purpose gluten free flour = 140 grams. That’s the most consistent and reliable weight that most professional cooks use and you can read more about it here on Food52 with Gluten Free Girl.
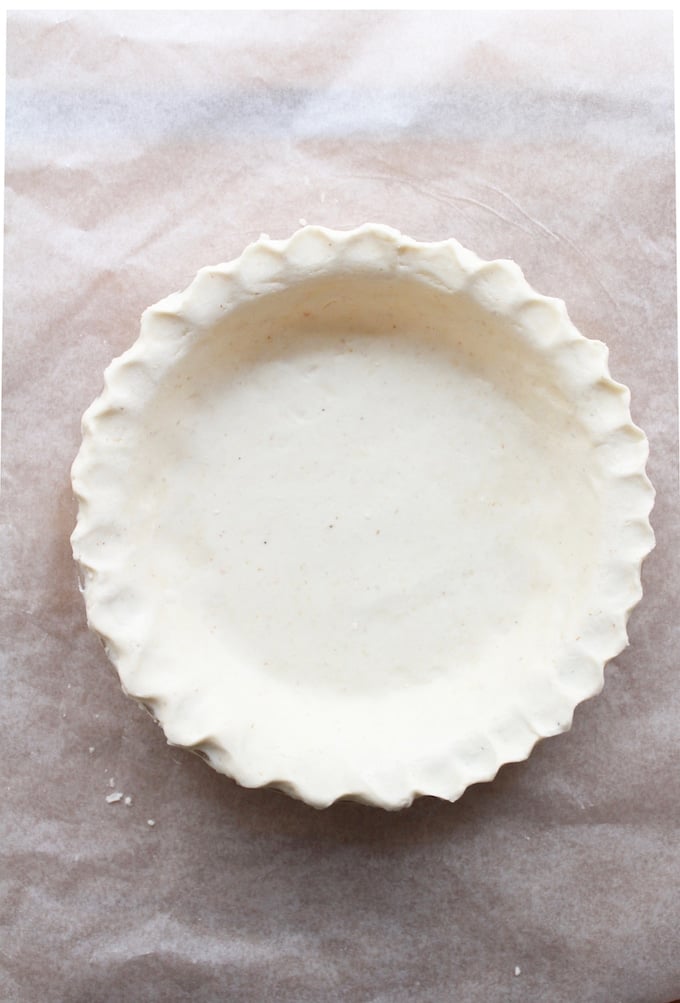
Now back to our pie crust.
A few things to know about making this gluten free coconut oil pie crust:
- (UPDATED) I recommend using a fork or a pastry cutter to mix your dough. In my experience, unless your kitchen is very cold the coconut oil will melt too fast. If the oil melts too much into the dough to the point where there are no pea sized bits mixed in then your crust will come out too crumbly. I’d also recommend chilling your mixing bowl and utensils in the fridge for about 20 minutes before mixing.
- I chose to use psyllium husk in place of xanthan gum as a binder. Since there’s no gluten in the recipe, psyllium husk is needed to make the crust easier to roll out. Xanthan gum is known to cause stomach irritation in a lot of people and I personally like using psyllium as a binding agent. You should be able to buy some at health food stores, or you can buy it online. Make sure it’s psyllium husk and not psyllium husk powder. Psyllium powder usually has additives mixed in making it unreliable in baking.
- If you leave the pie crust as is you’ll end up with a pale crust. If you’re ok with eggs you can make a quick egg wash and brush over the top of the dough before baking to get a nice golden crust. Here are a few vegan options if you want something that is both egg/dairy free.
- Add in the water one tablespoon at a time to avoid adding too much. My mistake with the first crust is because I added waaaay too much water which ended up in a rock hard crust.
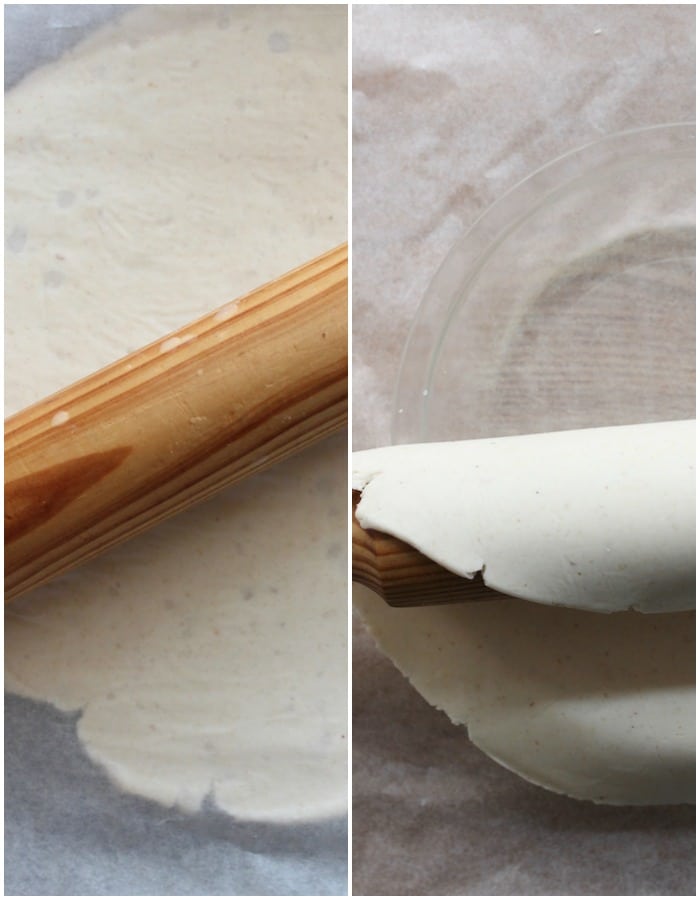
- Don’t roll the dough out on a floured surface if you can help it. Instead roll the dough between two sheets of baking parchment to prevent over flouring your dough.
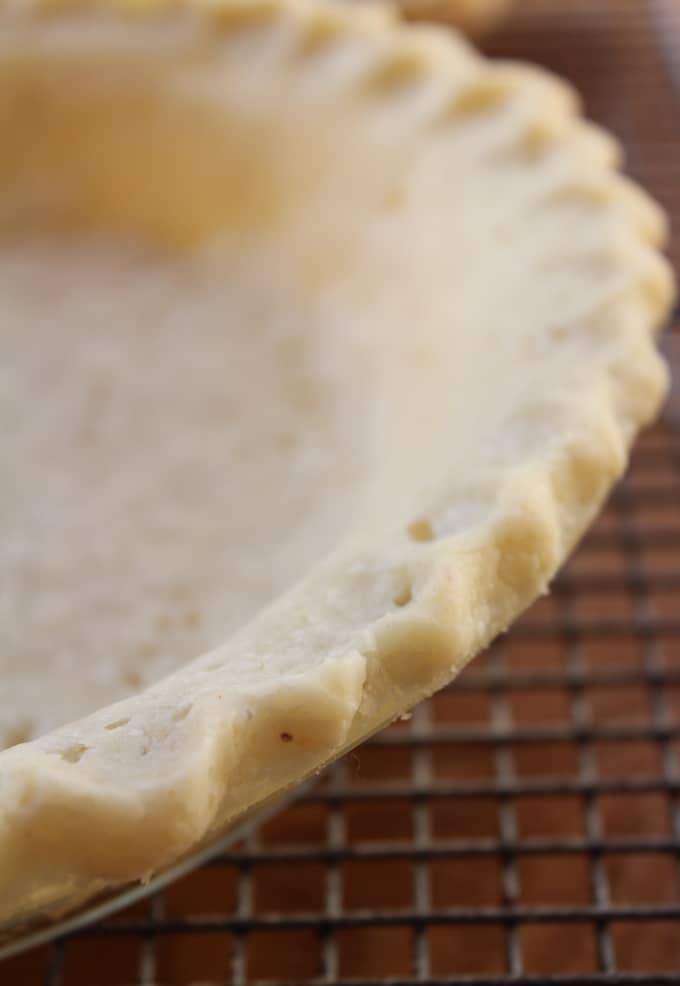
Let me know in the comments below if you making your own gluten free coconut oil crust /if you make and adjustments! Or if you’ve got any questions or need trouble shooting just let me know.

Gluten free coconut oil pie crust
Gluten free coconut oil pie crust - only five ingredients needed to make this tender, flaky pie crust that's completely dairy & nut free.
Ingredients
- 1 teaspoon psyllium husk + 2 tablespoons warm water, (not psyllium husk powder)
- 1 1/4 cup gluten free all purpose flour without xanthan gum, (175 grams)
- 1/2 teaspoon salt
- 2 teaspoons organic cane sugar
- 5 tablespoons extra virgin coconut oil, (65 grams) * see note
- 3-6 tablespoons ice cold water
Instructions
- In a small cup whisk together the psyllium husk & water until combined. Place in the fridge or freezer for a few minutes while you prep the rest of the ingredients.
- Add the flour, salt and sugar to a large mixing bowl and whisk together until combined.
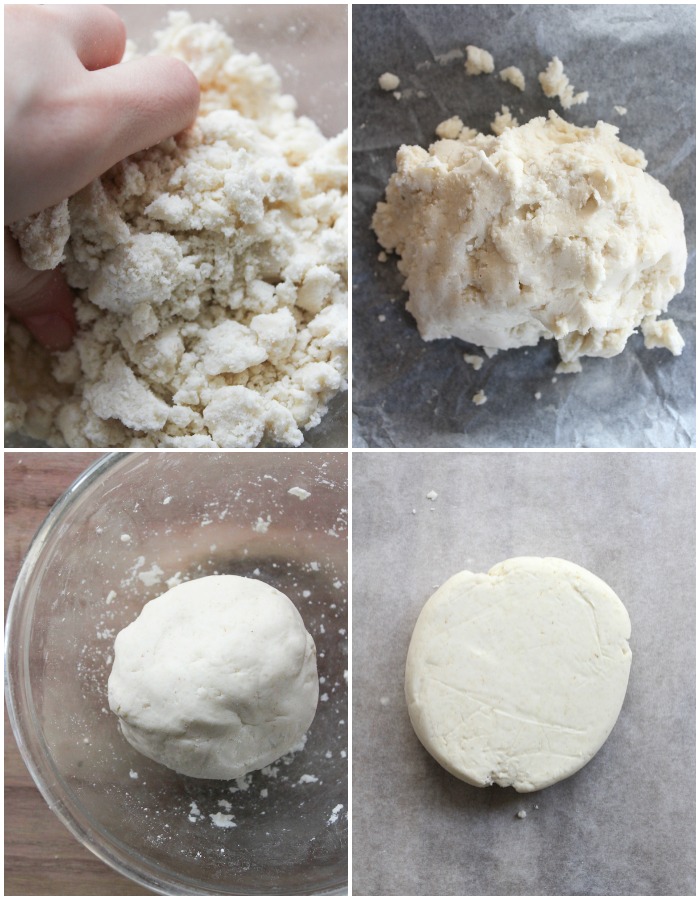
- Mix in the coconut oil and with a pastry cutter or fork with the flour (see note below**). Keep mixing until you get a clumpy/sandy mixture and make sure to leave some of the coconut oil in small pea sized chunks.
- Add the psyllium husk mixture.
- One tablespoon at a time, add in the ice cold water. Don't be tempted to add more than 6 tablespoons of water because then your pie crust will come out as one giant brick.
- Clump the dough together until it sticks and transfer it to a sheet of baking parchment. Form a disc as if you were forming a burger/patty.
- Place the dough in bowl, cover, and place in the fridge for at least 15 minutes.
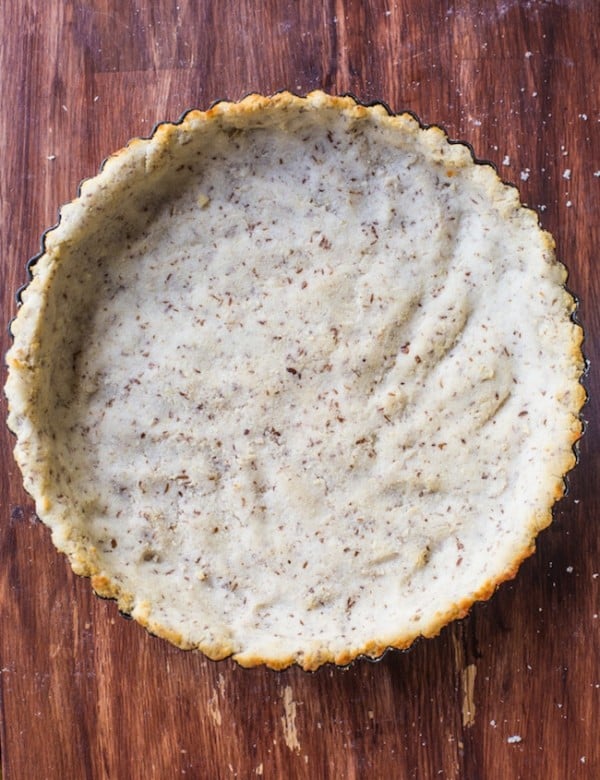
- Place another sheet of baking parchment over the top of the newly formed disc and begin rolling out the dough until you get it to be 1/8-1/4 of an inch thick. Using the rolling pin carefully roll the dough onto the pin and drape it over your pie pan. Push the bottom and sides of the dough carefully into the place and remove the excess hanging over the sides. Form/crimp the crusts however you'd like.
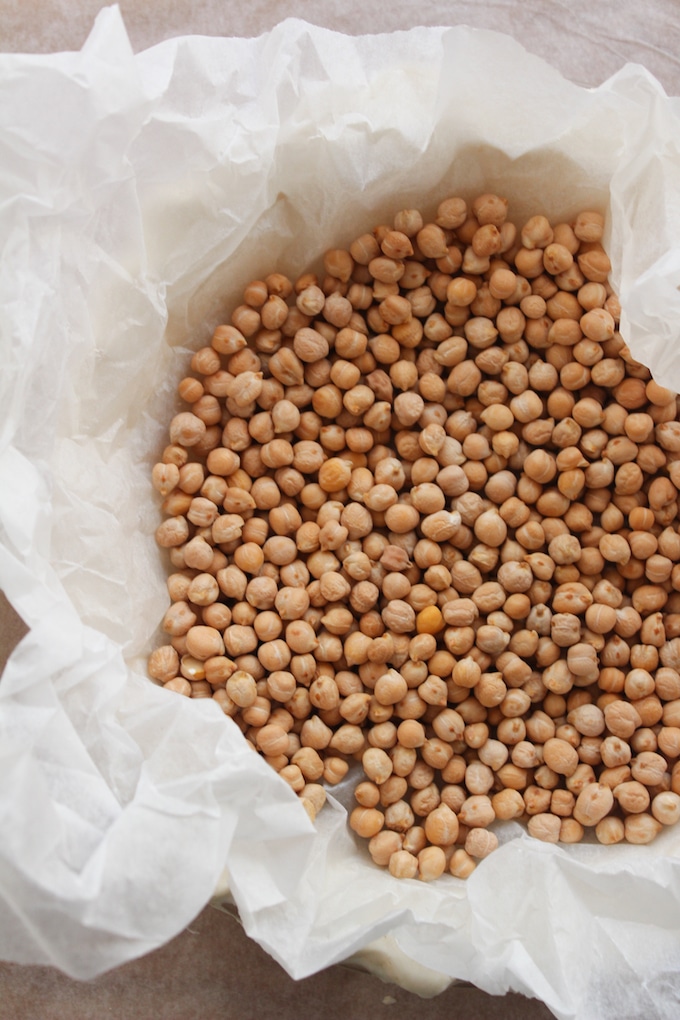
- To prevent the crust from bubbling up in the middle or the sides place your pie weights down in the middle. If you don't own any weights you can use dried beans or chickpeas like I did. Just place a sheet of baking parchment in the middle of your crust and fill with beans to weight it down. Alternatively you can use a fork to prick all around the bottom to allow the steam to escape without bubbling up.
- Bake your pie in an already heated oven at 375°F/190°C for 15 - 20 minutes. Remove from the oven when finished and place on a cooling rack to cool completely before filling.
Notes
You want your oil to be easy to scoop out of the jar, but not a liquid or in any way runny. If your coconut oil is liquid at room temperature, place the jar of oil in the fridge for about 30 minutes before using.
I recommend using a pastry cutter or a fork to mix the dough. If you live in a really cold place with a freezing kitchen you may be able to get away with using your hands. If the oil melts too much into the dough to the point where there are no pea sized bits mixed in then your crust will come out too crumbly after you bake it. I'd also recommend chilling your mixing bowl and utensils in the fridge for about 20 minutes before mixing.

Francini says
Can I replace sugar for xilitol?
Sarah says
That shouldn’t be a problem!
Kristy says
I’m sorry, but I can’t see the recipe…I scrolled and scrolled the page looking, to no avail! Please can you direct me to the recipe?
Sarah says
Hi Kristy! So sorry about that! I recently updated the way my recipes are formatted on my site and somehow ended up removing a few recipes – technology is hard! It’s back up now – thanks for pointing that out to me so I could fix it!
Sarah says
Hi there! Thank you for your post. I’ve been trying to make coconut oil pie crusts for a couple weeks now, but keep running into the same problem and I’ve tried two different recipes (yours being one of them) so I thought maybe you could offer me some advice. I followed your exact grams and directions (I bake a lot!) but I left out the psyllium because I used Bob’s Red Mill cup for cup gluten free blend and it has xanthan gum. I usually have good luck with that blend, but when I try to roll out the dough it just breaks apart on me and I used the full 6T of water. When I mold it in a ball it stays together. If I handle it a bit and warm it up some it will finally roll out with a bit of effort, but then when u transfer it I have to do it with the parchment paper because it isnt elastic enough to roll onto my rolling pin. Even with the parchment transfer it still breaks apart and I have to piece and pinch it back together. Is there any thoughts you have to help me? Thanks!!
Sarah says
Sorry, one other question too…On my recipes that require longer baking (1 and 1/2 hours) the crust gets rock hard and crunchy. Is that typical of a coconut oil crust when baked that long? When I’ve baked it only 50 minutes it isn’t hard like that.
Sarah says
Hi Sarah!
When the dough breaks apart is it cracking in places or is it just falling apart altogether? For reference – I made a video for some hand pies that used this pie crust recipe. If you skip to about 45 seconds in you’ll see when I’m assembling the pies and the dough does crack in some places. https://www.asaucykitchen.com/strawberry-hand-pies-lemon-drizzle/
Is it like that, or is it more brittle? Unfortunately a little bit of breaking is expected in a recipe like this since there’s no sticky gluten to hold everything together. For those types of cracks you can just pinch it together once you’ve got it where you want it, smooth it out, and no one would know the difference which is what I did in these pictures.
It’s also possible that your dough is even less flexible than it should be without the psyllium husk. One of the pros of using psyllium husk in gluten free baking is that it’s a more flexible binder that’s easier to handle and roll out. Using xanthan in stead of psyllium won’t make a difference on the final taste it’s just going to be a little trickier to move once it’s rolled out thin. That being said, a little breakage is still going to happen here or there
As far as the bake time goes I’ve never made a recipe that required baking the pie crust for that long so I don’t know. I even tried to google it to see if anyone mentions it anywhere, but I can’t find anything about it. What are you trying to make (just out of curiosity)? I think it must just be too long for the crust to handle?
I hope that helps, but let me know!
Sarah says
Hello there! Thank you so much for your detailed reply, I really appreciate it! I watched the video and it is similiar to that, but I think a little worse. I can get it rolled out even though there is a fair amount of cracking during the rolling I just keep pinching it and re-rolling til I finally get it rolled out, but then if I try to pick it up it just breaks everywhere. And it sticks to the parchment sometimes too. The only way I can get it into the pie plate is to just take the ball and press it into the plate until I get it flattened out or to roll on the parchment and the use it to flip it into the pie plate, but then sometimes it sticks and it still breaks apart so I have to piece it back together. Especially when it hits the pie plate rim…it doesn’t hang over it, it just breaks onto the counter. If I picked it up like you did with your rounds it’d just break in half. I did make some hand pies that came out super flaky and delicious but I cut them out and left the bottom half where I cut it and the top half broke and I just pinched it back together. I’ve seen on the cooking channel where there are gluten free bakers and they pick up their dough on the rolling pin just like a normal pie crust and I always wonder what the secret is.
Even though I don’t like xanthan gum comma I was led to believe it was more binding than the psyllium husk, I would way rather use psyllium and since you have such luck with it I will have to buy some and try it. The pie that I was making that needed bake so long was a Martha Stewart recipe and it was for a rhubarb crumble pie. I have made the crust again since then and I pot pie application with a bottom crust and a top crust and it turned out beautifully but again it was so much of a headache and hard to work with. I think the time that it came out rock hard I may have just worked it too much and added an extra tablespoon of water because I was hoping it would help it stick together more, so maybe that was the problem? What flour blend do u use? Thanks again for your help!
Sarah says
Sorry for the errors, I was using talk to text on my ohone. Lol
Sarah says
*phone
Geesh! Haha
Sarah says
Hey again!
This might be tricky depending on how hot your kitchen is, but I’m thinking maybe if you let the dough warm up a little bit it would be easier to roll out. When I first made this pie crust in the winter my kitchen was freezing which kept the coconut oil from melting into the dough and rolling it out took a lot more elbow grease. When I make it when the weather is warmer I always find that the dough is a lot easier to roll out – on the flip side I then have to chill the dough before cooking it so that it gets flaky. I hope that makes sense! Also, I don’t know if you do this already, but I would sprinkle a tiny bit of flour on the parchment paper before rolling it out as well if it’s not wanting to behave. Just as an extra insurance that it doesn’t stick.
I think the extra water might have been the cause of the rock hard crust. I made that same mistake once thinking it would be fine but it came out so solid it was unbelievable. Now if I need to add a little moisture to seal cracks I just wet the tip of my finger and smooth it out and that does the trick for me.
I use Dove’s Free Free Plain White Flour – it’s a UK brand. I just looked it up and they don’t share the exact percentages but it’s made up of Rice, Potato, Tapioca, Maize & Buckwheat flour.
I wonder if the bakers you’re talking about used an egg based pie crust? Or maybe just the dairy makes a huge difference. I’ve made butter based gluten free pie crusts before and even those are a lot easier to handle.
And no worries about the typos – when I’m on my phone I’m more typos than actual words 😀
Jennifer A Stewart says
I usually overdo my dough as well. Only because I am not confident enough to walk away when there are lumps and dry spots. I am a huge coconut oil user and cant wait to try this one. I usually do mine in the food processor so I can’t wait to give it a whirl! Thanks for sharing with Saucy Saturdays. We have lots of GF peeps looking in!
Sarah says
Thanks, Jennifer! Pie crust can be so tricky in that way because I feel like a lot of times it comes down to taking a leap of faith. Let me know how it goes for you!
Raia says
Your crust looks beautiful. I’ve tried coconut oil in mine before, but it always just seemed to melt holes in my crust. :/ I’ll have to try your recipe. Thanks for sharing it at Savoring Saturdays, Sarah!
Sarah says
Thanks, Raia! I know what you mean about the holes from the coconut crust – that used to happen to me until I started to break up the coconut oil more so that it wouldn’t make huge holes. Unlike butter crusts you don’t want to leave the coconut oil into too many chunks otherwise that happens, ya know
Christine | Mid-Life Croissant says
Serious props Sarah. I have a hard enough time making pie crust following a recipe and you made up your own. I’m super impressed. I might try this too. I like the part about not worrying about over working the dough. That is usually my issue because I’m an over acheiver 😉
Sarah says
Thanks, Christine! Not over working the gluten is one of the good things about baking gluten free!
Kristen @ A Mind Full Mom says
I love cooking with coconut oil for so many reasons. And this pie crust looks fabulous. Pinned to try!
Sarah says
Coconut oil is my absolute favorite! Hope you like it 🙂
Patty says
Sarah, Can you use xanthum gum in direct prpprtion to the psyllium husk? Our Sarah is allergic to psyllium.
Thanks!
Sarah says
I haven’t tried it with xanthan, but you should be able to replace it one for one and have no problems – if you do try it let me know and I can make a note in the recipe for other people too 🙂
KC the Kitchen Chopper says
What a fantastic post. I’ve been searching for a gluten free crust recipe and you have delivered. I look forward to making this very soon. Thanks so much!
Sarah says
Let me know how it goes!
Megan @ A Dash of Megnut says
This looks awesome! LOVE all the tips you give 🙂 I’ve been working on a coconut oil pie crust myself but hadn’t thought of psyllium husks instead of the xantham gum. Do you know what the different is between the psyllium husk and the psyllium husk powder and how it works in baked goods?
Sarah says
Thanks, Megan! Let me know how it goes it you try it!
I’ve never tried psyllium husk powder personally, but from what I’ve read on it psyllium husk powder often has additives which makes it a little more unreliable in cooking. I’ve also heard from people that using the husk makes rolling things out easier as well. I’ve stated playing around more with using psyllium husk as a binder in gluten free/paleo baking and so far I’m really loving the structure it gives