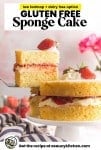
Light, airy and utterly delicious! This Gluten Free Victoria Sponge Cake is a must make recipe every home cook should have in their repertoire. The base sponge cake is the perfect cake for almost any occasion – dress it up, keep it simple or enjoy as is with a bit of cream and jam! This cake is great to make year round, but especially in the Spring and Summer months when you can top it with fresh fruit. Dairy Free + Low FODMAP
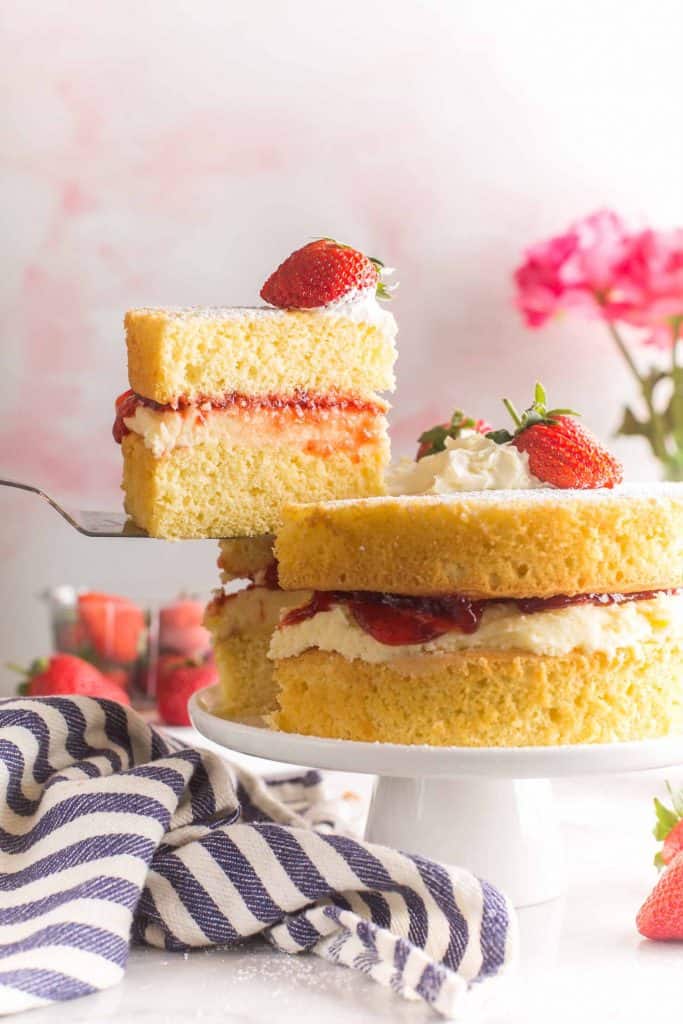
Make sure to check out the post below for tips, tricks, step-by-step instructions and video tutorial on how to successfully make this gluten free sponge cake. This cake isn’t too hard to make but it does require a bit of finesse and maybe a few bowls and mixings spoons. It will be well worth it in the end though, I can assure you!
I went through SO many cakes this past week or two all in the name of perfecting this recipe. I’m not even exaggerating when I tell you that I made at least 10 vanilla sponge cakes (I’ve also made some chocolate cake, carrot cake and vegan vanilla cake!)
After a LOT of frustration, eggs and flour….I now happily present you with this light, airy and just straight up delicious gluten-free sponge cake. Worth it!
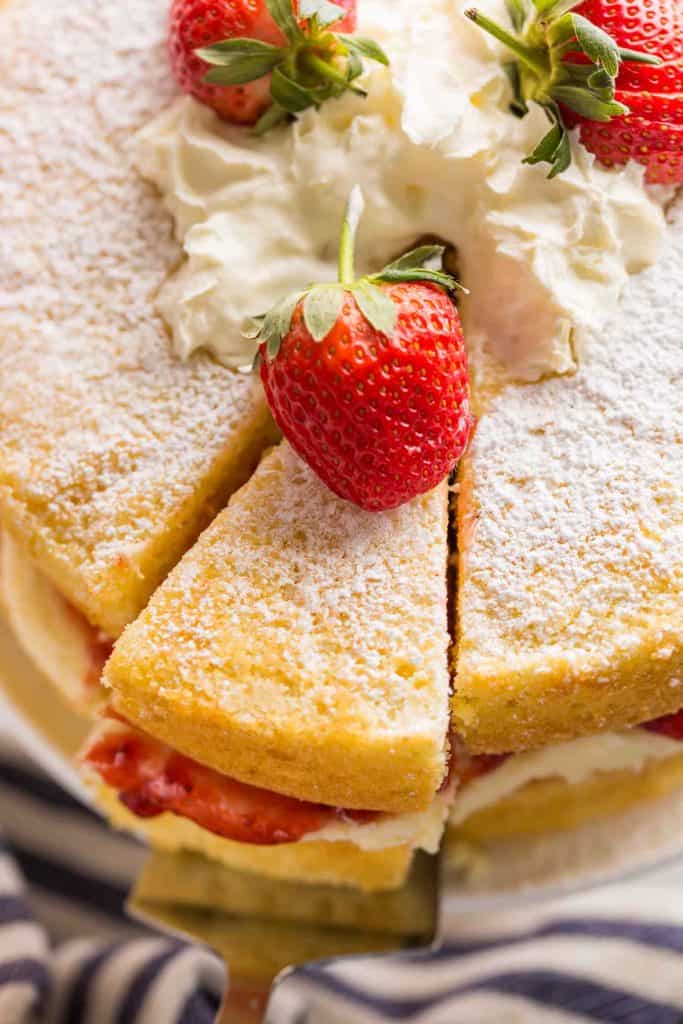
What exactly is a sponge cake?
Some cakes are meant to be rich, dense and decadent (think along the lines of my gluten free vegan chocolate cake).
Sponge cakes, on the other hand, are meant to be light and airy – just like a sponge. These cakes are more delicate and subtly sweet. They are also great at soaking up flavour which makes them a great cake to brush with a simple syrup or top with jam.
What’s a Victoria Sponge Cake?
While sponge cake refers to the actual cake, a Victoria Sponge Cake is a fully assembled sandwich cake made up of two sponges and filled with jam (usually strawberry or raspberry jam) and cream in the middle and a dusting of icing sugar on top. It’s a very simple and traditional cake found in nearly every coffee and tea room in the UK. For many it’s a taste of nostalgia. As an expat, it’s simply an excellent addition to a cup of coffee.
A little quiz trivia for you: A Victoria Sponge Cake gets its name because it was first created in the Victorian Era (named after Queen Victoria) thanks to the invention of baking powder. Baking powder (along with eggs) is what makes this cake so light and leavened.
How to Make this Gluten Free Victoria Sponge Cake
The key to success with this cake is that you need to incorporate as much air in to the cake as gently as possible.
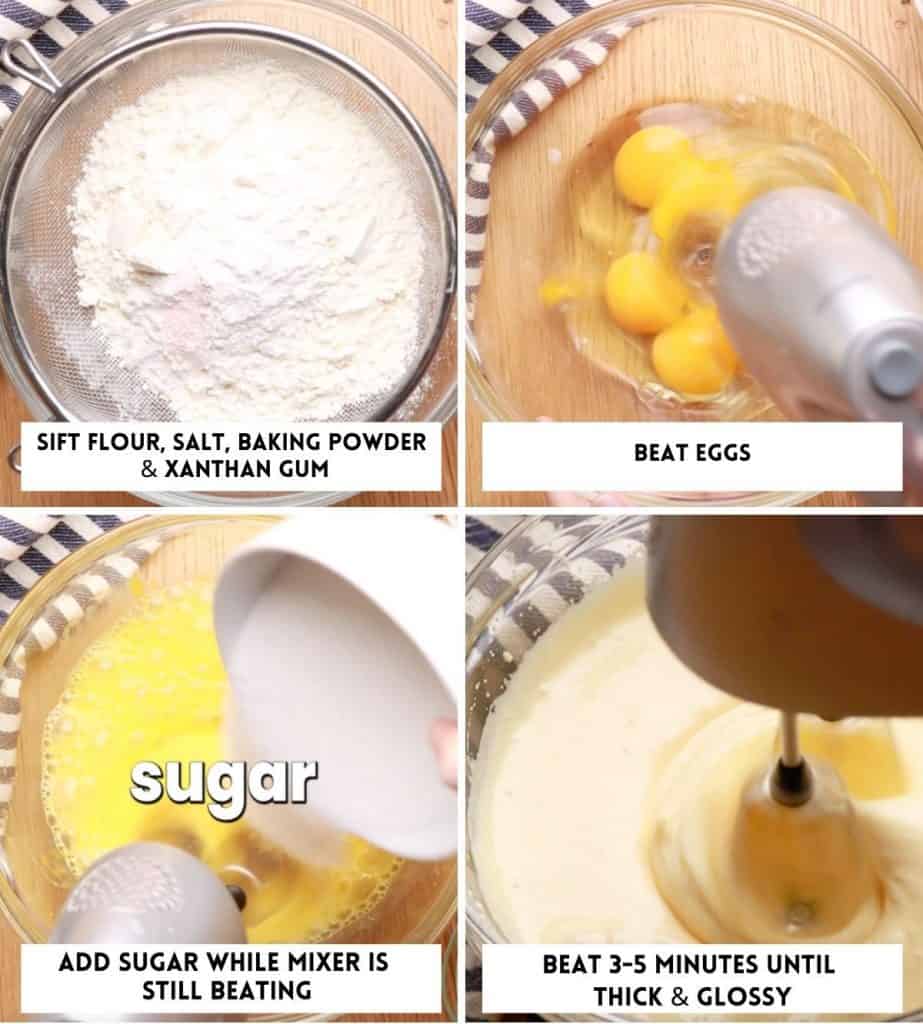
First things first: sift together the flour, salt, baking powder and xanthan gum (unless you blend already has xanthan in it) in a large bowl.
Why sift? Sifting your dry ingredients does two important things here:
- It breaks up large clumps of flour and mixes the dry ingredients evenly.
- It aerates the flour. Remember that air in the cake translates to lift and lightness.
In a separate bowl (sorry – we’re making a mess today!) beat your eggs on a high speed with an electric mixer with a whisk attachment for about 30 seconds, then begin adding the sugar. Beat the eggs and sugar about 3-5 minutes.
In baking terms you’re looking to reach the ribbon stage. The ribbon stage is when your eggs & sugar are whipped up in to a thick, pale-yellow and glossy texture. When you lift up your beaters or whisk from the mixture you should see a trail of batter fall from the beaters back into the batter. The trails should remain visible on top of the batter for a few seconds then disappear. Make sure you watch the video tutorial if you need a visual cue to help you out here. You can also take a look at some examples from King Arthur Baking if you still need help.
Fold the Sifted Flour into Eggs
What does it mean to fold ingredients and how do I do it? Glad you asked!
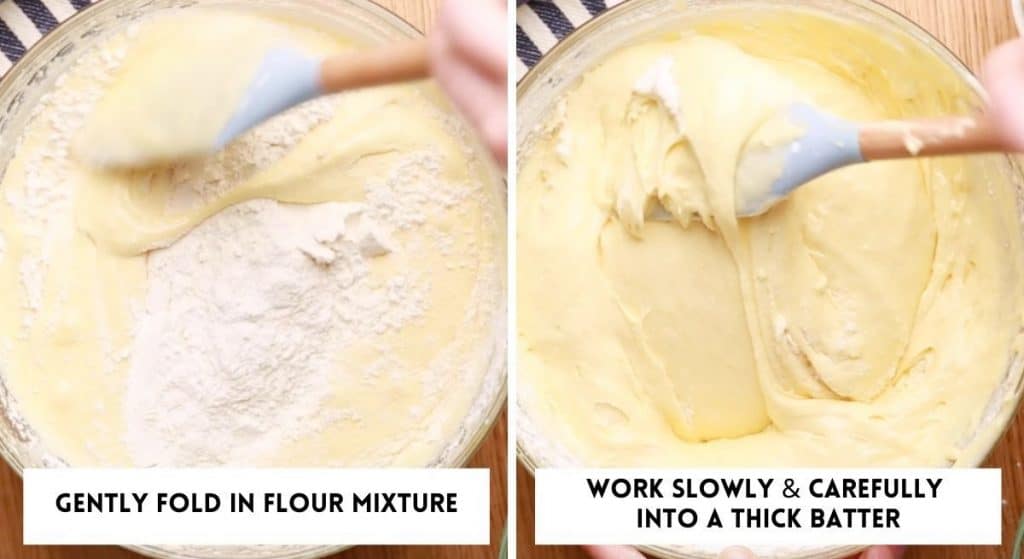
Folding is a way to gently mix ingredients together so that it won’t deflate your dough or batter. Remember all that beating and mixing we did with the eggs and sugar? If you mix things too quickly it will just deflate and make for a dense cake.
How to fold ingredients properly:
- Add light ingredients to heavy ingredients. In this case you’re adding the light and sifted flour to the thick and heavy eggs.
- Add slowly and in parts. Don’t add everything at once. Carefully spoon some flour in to the eggs and mix gently. Repeat until everything has been added.
- Make big circles and use the bowl as a guide. Use a rubber or silicone spatula to mix – something flexible that you can scrape the sides and bottom with. Mix the batter making big circles in the batter. The idea is to scoop the bottom batter and gently bring it up to the top.
Eventually your flour will be well and fully mixed and you should end up with a very thick batter.
Warm Milk & Melt Butter
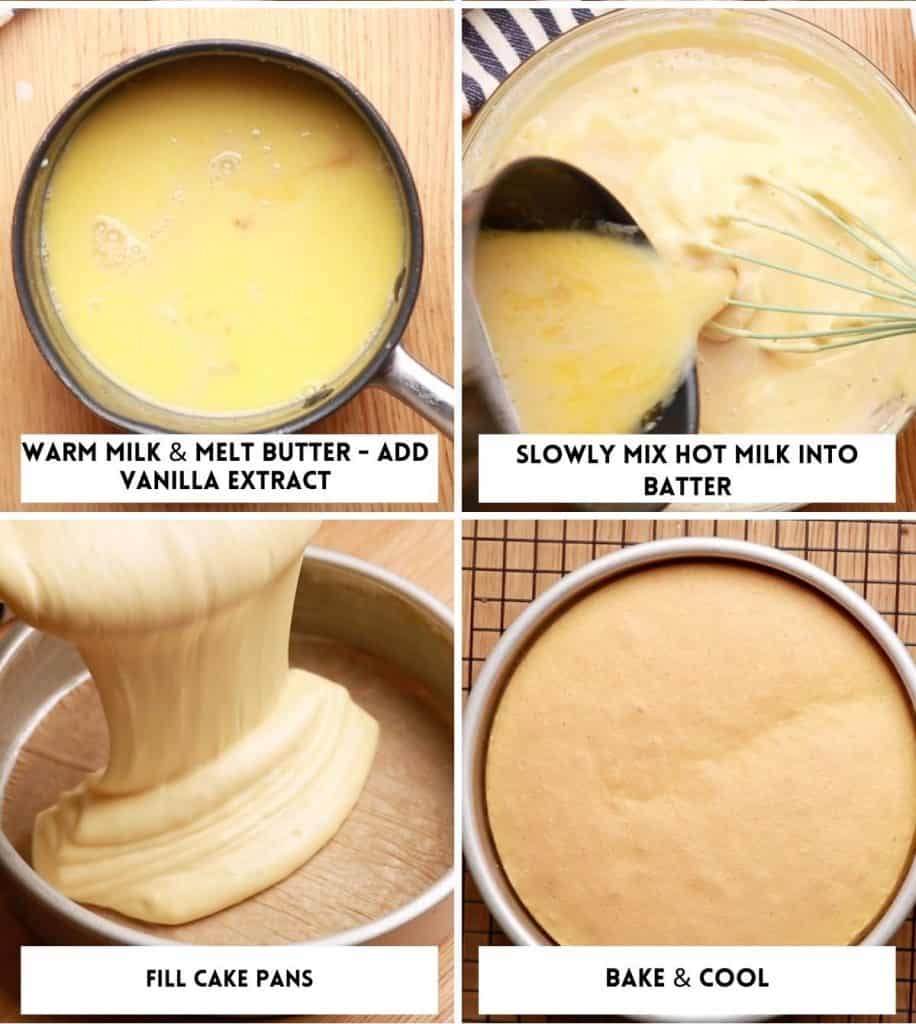
Warm the milk and butter in a small sauce pan until the butter has melted and the milk is just about to boil. Add the vanilla extract and remove from the heat.
Why heat the milk & butter?
To keep it short: Adding a hot milk and melted butter to your cake batter makes for an improved, velvety and evenly crumbed cake. It also makes it taste better!
Bringing it all together – finally!
Slowly add the hot milk in to the batter. The idea is to mix gently until just combined. You want to avoid over-mixing at this point because over-mixing will just result in a dense cake that doesn’t properly rise.
You also want to make sure that you mix everything fully. Scrape the bottom of the bowl. If you’re using a glass bowl, make sure to look underneath to make sure no streaks are visible.
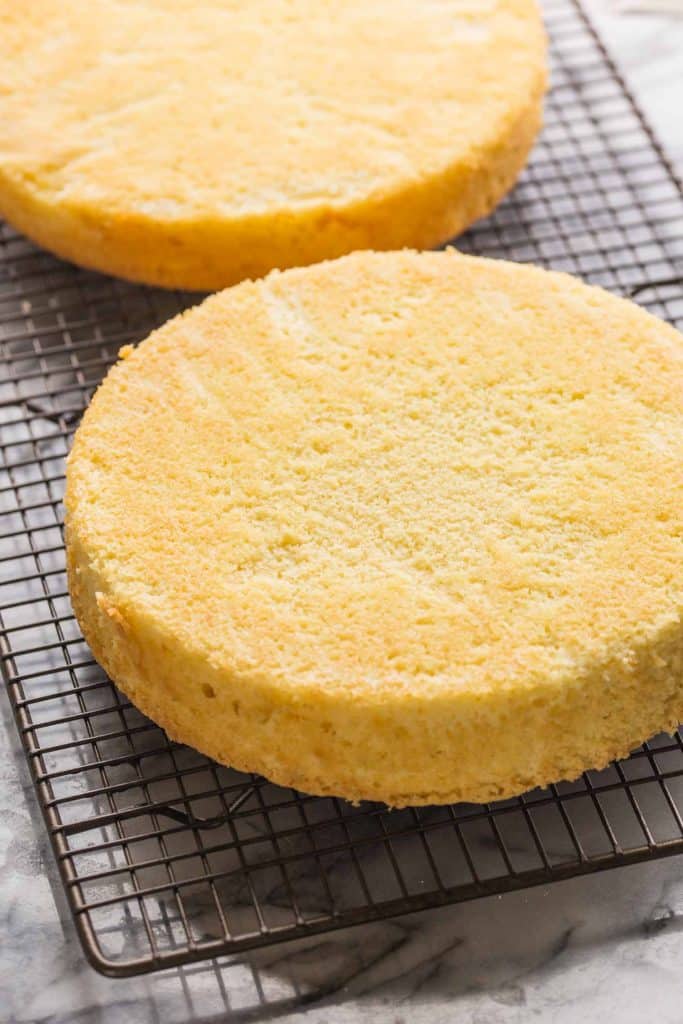
Once mixed, simply divide between two 8 inch cake pans. Make sure to grease and line the bottom and sides of the pan well. Bake and that’s it! Cool on a wire rack and frost as you see fit.
More Questions & Answers
What type of flour should I use?
- Any general gluten free flour blend should work here whether it’s homemade or store bought. This makes up the foundation of this cake.
- I have also tested this cake using a quick homemade all purpose flour blend made up of a few gluten-free flours: 67% rice flour, 22% potato starch and 11% tapioca. Check the recipe notes if you’re interested in using this blend.
Can I make this cake grain free? Can I make this cake healthier?
- If you’re looking for a healthy cake recipe I’ve got a few you might like to look at instead of this one. This recipe was designed and tested to be a more traditional/standard vanilla sponge cake. I don’t recommend any flour or sugar substitutes other that the ones I’ve included in the recipe.
- Healthy Gluten Free Cakes You Might Like:
How can I make this gluten free sponge cake dairy free?
- Easy! Just use dairy free milk in place of dairy milk and vegan butter in place of the dairy butter. You can also use vegetable oil in place of the butter.
Can I omit the xanthan gum?
- I don’t not recommend skipping the xanthan gum here. I have tested this cake a few different ways without xanthan (one time with corn starch and one time without any subs) and I have yet to find a reliably successful substitution yet. Both cake trials that I made without xanthan resulted in a cake that looked alright coming out of the oven, but crumbled almost as soon as it was cut into. If I ever find a good substitute I will make sure to come back and update this recipe.
- Check out my post on Xanthan Gum to learn more about why it’s useful in gluten free baking.
Can I freeze this cake?
Yes! There are a couple of different ways you can go about freezing this cake:
- You can freeze the unfrosted cake layers. After baking allow your cakes to completely cool. Once fully cooled, wrap your cakes in plastic wrap then wrap again in a layer or two of foil. Once wrapped you can freeze your baked layers up to three months. Let the cake defrost in the fridge (about 12 hours) when you’re ready to use. Make sure to write out the date and label on your cake before storing it.
- You can freeze the frosted, finished cake. I recommend freezing the cake in individual slices so that you don’t have to defrost the entire cake just for one slice. Wrap in plastic wrap then wrap in foil or place in a freezer safe container. Keep frozen up to three months. Allow to defrost in the fridge before eating.
How to make sure your cake properly rises:
- Make sure your baking powder hasn’t gone off. Baking powder is an important ingredient in this recipe as it is key to rising. Old baking powder that has gone off will impact that end result.
- Avoid opening the oven while the cakes bake. Opening the oven door (especially in the first half of the bake) lets hot air out and cool air in. This temperature change in such a crucial point of baking will likely cause your cakes to collapse in the middle.
- Make sure your cake is fully cooked. Another reason your cake might deflate after coming out of the oven is if it was taken out too early. Make sure that your oven was fully heated up before baking and try not to get too impatient by taking the cake out early.
- Use room temperature ingredients. The milk & butter will heat up on the stove but I recommend making sure your eggs are room temperature here as well.
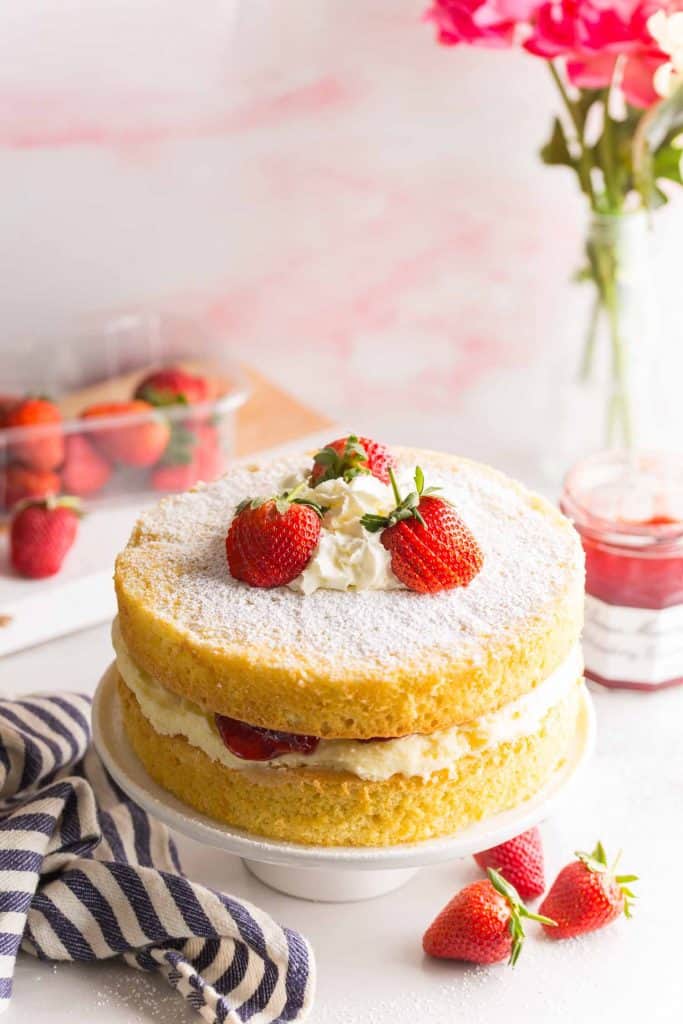
And here we are! A Gluten Free Victoria Sponge Cake that’s truly light, airy and delicious!
Traditionally, Victoria Sponge Cakes are filled with freshly whipped cream. I chose to make an American buttercream for my filling (I suppose that’s fitting) as I found the whipped cream was more slippery to work with. It also seeped into the cake a bit more than I liked.
Since first sharing this cake, I’ve been obsessed with my whipped mascarpone frosting! It’s a stable enough to hold up the two layers without slipping and it’s super soft and airy.
I’m also a big fan of adding a layer of homemade lemon curd for a bright and zesty flavor.
That being said, feel free to fill your cake with whichever filling you’d like – it’s up to you!
If you try this cake out – please let me know how it went! As always – ask away any questions that I didn’t answer here below in the comments!
Gluten Free Sponge Cake
Light, airy and utterly delicious! This Gluten Free Victoria Sponge Cake is a must make recipe every home cook should have in their repertoire. The base sponge cake is the perfect cake for almost any occasion - dress it up, keep it simple or enjoy as is with a bit of cream and jam! | Dairy Free + Low FODMAP
Ingredients
Cake
- 2 cups | 280 g gluten free all purpose flour blend
- 2 teaspoons baking powder
- 3/4 teaspoon xanthan gum
- 1/2 teaspoon salt
- 4 large eggs, room temperature
- 1 1/2 cup | 300 g white granulated sugar
- 3/4 cup | 160 ml milk (dairy free if needed)
- 1/4 cup | 56 g butter (dairy free if needed)
- 2 teaspoons vanilla extract
Filling
- 1/2 cup | 113 g softened butter (dairy free if needed)
- 1 cup | 125 g powdered/icing sugar
- 1-2 teaspoons milk (dairy free if needed)
- 6 tablespoons strawberry (or raspberry) jam
- powdered/icing sugar for dusting on top
Instructions
Cake
- Preheat oven to 350°C/175°C. Grease and line the bottoms of two 8 inch round cake pans. Set aside.
- In a large mixing bowl: sift together the flour, xanthan gum, baking powder and salt. Sift until well combined. Set aside.
- In another large mixing bowl beat the eggs with an electric mixer on high, about 20 seconds. Gradually add the sugar as the mixer is running. Continue to beat the eggs and sugar together on high, about 3-5 minutes until the mixture is pale-yellow, thick, glossy and has tripled in volume.
- In a small sauce pot, warm the butter and milk over a low heat. Warm until the milk is just about to boil and the butter has melted. Add the vanilla extract.
- In three stages, add the flour mixture to the egg mixture. Use a wooden spoon or rubber spatula to fold the flour into the eggs. Work slowly and carefully to avoid over mixing the batter. Continue until all the flour has been added and fully mixed in to the batter. The batter should be thick and airy.
- Slowly pour the melted butter, milk and vanilla into the batter. Mix gently with a large whisk until just combined.
- Pour the batter into the two prepared cake tins. Gently lift up the tins and drop them on a counter/table surface to get rid of air bubbles.
- Place in the middle of the oven and bake for 28-30 minutes. To check for doneness, insert a knife or tooth pick into the centre of the cake. If it comes out clean it's done.
- Let cool in the tin for about 10 minutes then flip over onto a cooling rack. Let cool completely before frosting or filling.
Filling
- In a large mixing bowl, beat the butter with an electric mixer on high until light and fluffy.
- Add the powdered/icing sugar to the butter and continue mixing until a thick frosting forms. Taste and add more sugar to your tastes. If you want a thinner frosting that spreads easier, add a teaspoon or two of milk. For a thicker frosting add more sugar.
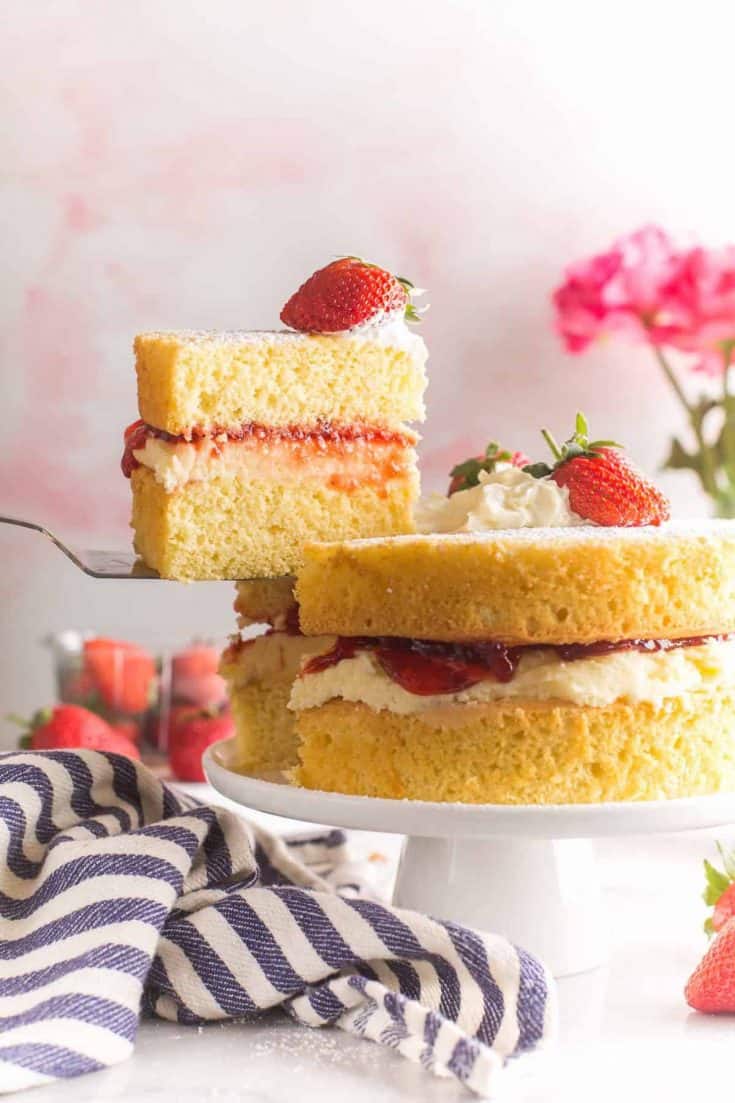
- Assemble the cake: Spread an even layer of buttercream across the top of one cake. Then spread the jam over the buttercream. Don't spread the jam too far towards the sides or it will spill over the edges.
- Place the second layer on top. Dust the top layer with icing/powdered sugar. Enjoy the cake as is or top with whipped cream and berries and enjoy.
Notes
- More traditional Victorian Sponge Cakes are filled with whipped cream instead of buttercream. I chose buttercream because it make for a more sturdy cake slice (not as likely to slip or smoosh out the filling). Feel free to swap out the filling
- Cake will keep 3-4 days at room temperature before it starts to dry out. It can keep at least a week covered and kept in the fridge.
Quick DIY GF Flour Blend
You can use this flour blend in place of a store bough blend. Make sure to add xanthan gum to your recipe as it's needed for binding.
- 1 1/3 cup | 186 g white rice flour
- 1/2 cup | 76 g potato starch
- 1/4 cup | 28 g tapioca starch
Nutrition Information
Serving Size:
1 slice Calories: 349Total Fat: 10gSaturated Fat: 5gCarbohydrates: 62gFiber: 0gSugar: 40gProtein: 4gMore Gluten Free Cakes
- Gluten Free Swiss Roll With Strawberries & Cream
- Gluten Free Carrot Cake
- Gluten Free Funfetti Cake
- Gluten Free Lemon Cake With Blueberry Filling
- Gluten Free Chocolate Cake
- Gluten Free Vegan Chocolate Cake
- Paleo Coconut Flour Cake
- Egg Free Coconut Flour Cake
- Paleo Carrot Cake with a Cashew Cream Frosting
- Gluten Free Banana Cake with a Cream Cheese Frosting
- Gluten Free Tiramisu (Easy Recipe!)


Monica says
Hi, our daughter in law is English and she would love a Victoria sponge for her birthday. Not sure if plain gf flour has Xanthan gum in it (always decant ) should I use Xanthan anyway?
Really nervous about making this as I have never made a sponge at all. Thanks
Sarah Nevins says
Hi Monica! If you’re not sure I recommend that you add it just to be safe – a little extra won’t hurt. I’d hate for you to go through all the effort only for it to be a bit too crumbly in the end. I’m sure you’ll do great! 🙂
Sierra says
10/10, my brother said it’s better than the glutinous cakes at his favourite bakery. Used this cake as the base for two mango mousse cakes for his birthday/graduation. I test baked several other recipes as well, and this sponge clearly had the best structure and taste of the 4 recipes I tried.
I even messed it up the third time I made it because I was in a rush, and beat the dry ingredients in instead of folding – and the cake still came out fluffy and beautiful. (I don’t recommend this though. I probably overbeat my eggs a little to begin with, and I’m incredibly lucky I didn’t pull an inedible brick out of the oven.)
On my third and fourth rounds of the recipe, I also found that I could eliminate an extra stage of folding (or accidental beating) by melting the sugar with the butter and milk. It’s a super durable cake and I can’t wait to make more and fiddle with flavours. 🙂
Sarah Nevins says
Hi Sierra! Thank you so much, that makes me genuinely so glad to hear! Also – mango mousse cake sounds incredible!
Thank you also for sharing what you did differently! I know I always find it incredibly helpful to know what else can work and I’m sure other future bakers reading the comments will too 🙂
Siya says
Hi I really loved this Victoria sponge cake – it was so delicious and light! how would I alter the recipe to change the flavour of the cake to coffee?
Sarah Nevins says
Hi Siya! I’m so happy to hear you enjoyed it 🙂
There are a couple of ways to do this:
The easiest way would be to use coffee extract in addition to the vanilla extract. I would try it with 1 tablespoon coffee extract just in case the flavor starts coming out too bitter.
Coffee extract isn’t always easy to find though so you could also try adding instant coffee powder (or coffee granular ground into a powder) to the batter. Usually recipes like this use about 3 tablespoons. I would actually recommend you add the coffee powder to the milk and butter pot as it’s heating up. This way you know it should fully dissolve into the batter.
I also just read that it’s a good idea to add cinnamon (about 1 teaspoon) and cardamon (1/4 teaspoon or a pinch) to coffee flavors baked goods. Apparently they help highlight some of those coffee notes for a more rounded flavor.
I hope this helps! Coffee cake sounds delicious – I think I’m going to have to try this out now myself!
Siya says
Thank you so much for the detailed reply! I will definitely be trying those extra tips with the cardomom and cinnamon. It sounds like a wonderful idea!
Sarah Nevins says
Yay! Glad I could be helpful!
Sierra says
Oooh, now I have to try something like this! For chai and coffee flavoured truffles, my step mum boils her milk/cream with a little bag of spices, tea, and/or coffee, which she pulls out like a tea bag. Then she can use the milk just like normal for the recipe without having to change anything or worry about chunks. Maybe something like that would work?
Helena V says
Hi Sarah , I tried your victoria sponge cake , it’s double thumbs up! light , moist and not too sweet – perfect when adding the jam . I was surprised , how light the sponge is for GF cake . I use 2 x 7″ tins – with perfect result 2 ” height ! i am wondering if icing the sponge for a layer cake ? should find out .
Definitely , I will try different cake recipe from your web.
Sarah Nevins says
Hi Helena! I am SO happy to hear how much you enjoyed it! I think I might have seen your picture on instagram – it looked amazing!
When you say icing the sponge, do you mean frosting the middle? If so then you definitely can, but I would recommend using a thick, sturdy frosting like an American or Swiss buttercream. Whipped cream that hasn’t been stabilised might not hold up as well under the cake layers so that’s a trickier option.
Thank you so much for coming back to let me know what you thought of the cake! If I didn’t answer your question by the way please come back and let me know 🙂
Helena V says
Yes , I thought using American buttercream and Swiss buttercream to icing the whole cake ! Do I need to add simply syrup before assembly the cake?
Sarah Nevins says
No need to brush the cake with simple syrup! The only time I bother with simple syrup is when I’m making a lemon cake and that’s just to infuse as much lemon as possible – otherwise, no worries!
Michelle says
Could I make this in 1 cake pan? Or is 2 essential?
Sarah Nevins says
Hi Michelle! This recipe makes enough batter to comfortably fill two pan. If you wanted to only use one you would need a much larger cake pan to fit all the batter. With a larger pan you would also need to cook the cake for longer. I’m not too sure on the time without trying it myself though so I can’t say for sure.
Indi says
Hi,
I’ve been loving your recipes, can’t wait to try this one out.
II would like to try replacing the sugar with homemade date syrup (basically just dates blended with milk and vanilla essence) do you think that this would result in the same texture though?
Would appreciate a reply very much, thanks
Sarah Nevins says
Hi Indi! I’m so glad you enjoyed what you’ve tried so far 🙂
As for this cake, if you want to make it with a date syrup I might recommend that you make a cake like this instead: https://www.asaucykitchen.com/coconut-flour-cake/ This recipe uses maple syrup or honey instead of traditional sugar so I think date syrup would work quite well here. The crystallised sugar makes quite a difference in this recipe in create a light and airy kind of texture. Swapping it out for a liquid sweetener would almost certainly change the texture and moisture levels of the cake to the point that I’m not too sure how it would come out without trying myself.
Hope that helps!
Joy says
Hello, is it alright to omit the xanthan gum if my flour blend contains it?
Also, what depth are your cake pans? I’d like to bake this cake in 6×3 in pans.
Thank you!
Sarah Nevins says
Hi Joy! If your flour blend already has xanthan then your totally fine omitting it here. As for the cake pans – they’re 8×3 inches. To bake this in 6 inch pans you’ll probably only need about 18-20 minutes in the oven. Hope that helps!
Debbie Rothwell says
Tried this for the first time. Found it so easy to follow. The result was a beautiful moist sponge cake. Might have needed to leave it a few more minutes in the oven as they sank slightly but was still just yum!
Sarah Nevins says
Yay! So glad you enjoyed it! 🙂
Linda says
Initially it seems a bit of a faff to make, but have made several times now. Definitely my best GF sponge recipe. Rises so well in 2 x 8” tins – no doming or need to trim crusts. It stays moist after 4 days. I filled mine with lemon and lime curd. I have also successfully substituted S&c naturally flavoured icing sugar for some of the sugar.
It is too fluffy to decorate with sugar paste for a birthday cake (at least mine is) but then that’s the case for Victoria sponges. Everyone loves it, coeliac or not! Thanks so much for sharing the recipe.
Sarah Nevins says
Hi Linda, I’m so glad you’ve enjoyed it! I totally know what you mean about the faff! I’ve tried making this cake a few times without going through all the extra steps of sifting/beating etc but it just didn’t come out as well. Thanks so much for coming back to leave a review letting me know what you think!
Sabrina says
I prefer subtly sweet to super sweet and other dessert flavors over chocolately chocolate, this will do nicely! Love the history of it too, thank you!
Sarah Nevins says
Thanks Sabrina! I’m with you as well – chocolate is nice but I’ll take a plain cake with fruit & cream any day. Hope you love it!