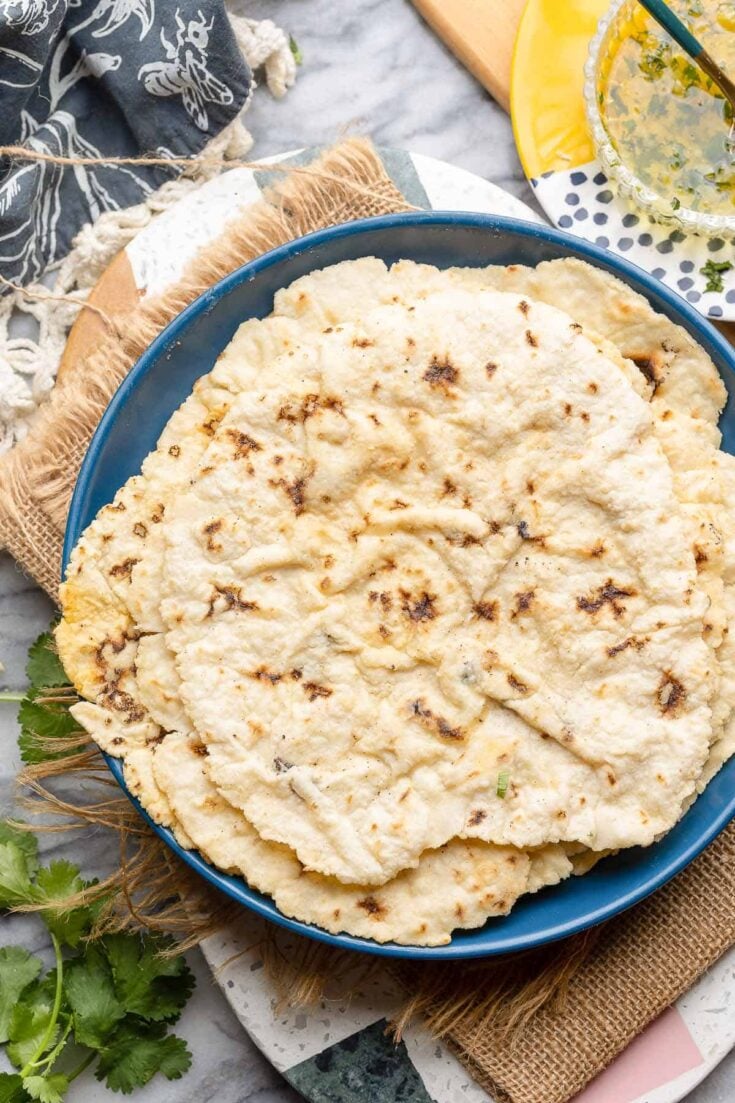
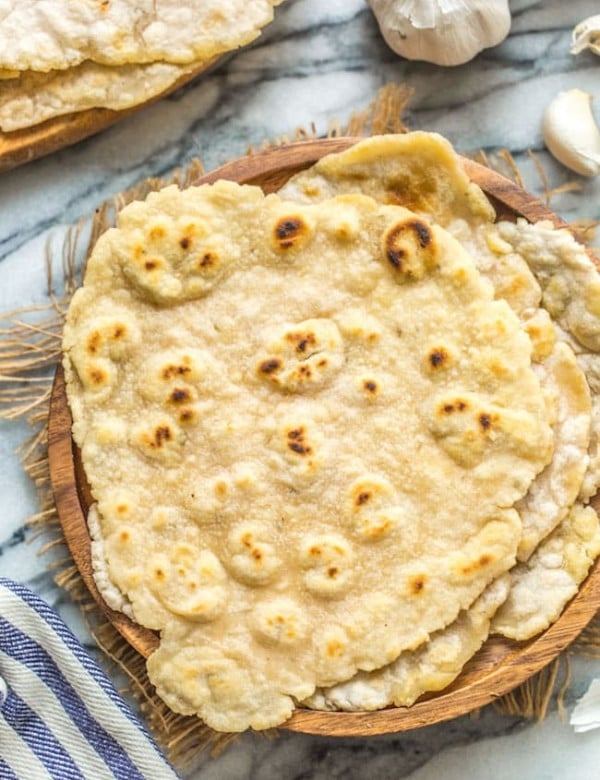
Gluten Free Roti – They’re soft, flexible and super easy to make! Make this roti recipe with only 4 simple ingredients: millet flour, water, salt and oil. | Gluten Free + Vegan + Low FODMAP
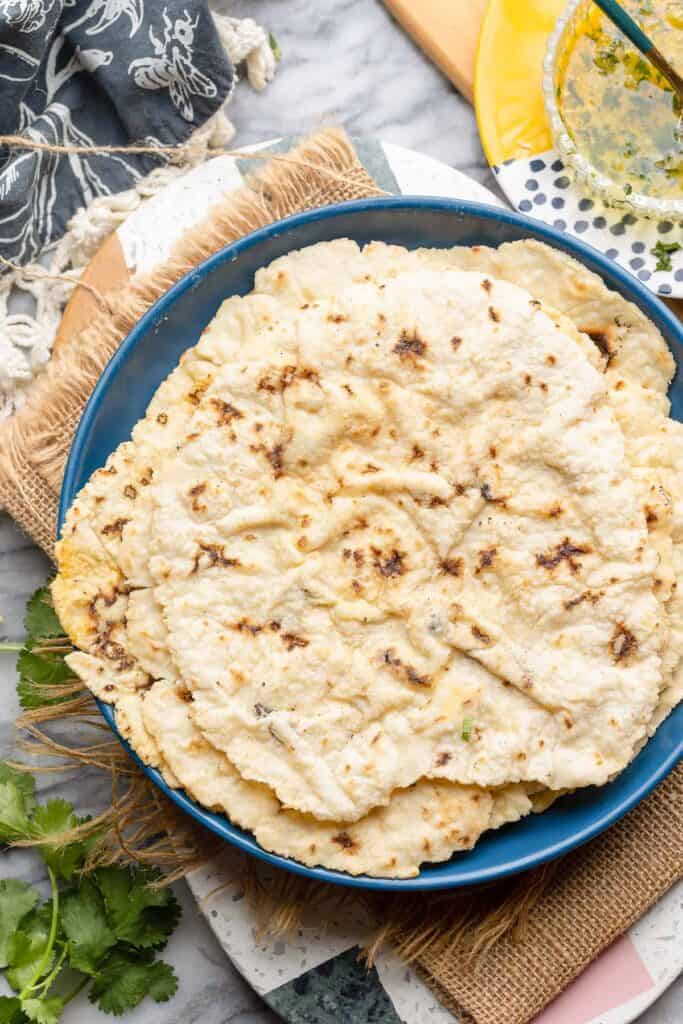
Okay. I admit that these may not be the neatest or the prettiest gluten free roti. Looks and lack of clean edges aside – this is a recipe you won’t want to miss!
This is the second millet flour recipe I’m sharing as I work on my upcoming series working with different gluten free flour flours. The recipe here today comes curtesy of one shared by Kitchen Queens on Youtube.
What You’ll Love about these Gluten Free Roti
- It’s made with only four ingredients: Millet flour, water, salt and oil.
- It’s easy to make! Boil some water, mix in the flour, knead into a dough and roll out flat. Other than a little elbow grease to knead and roll, it’s a straightforward process.
- It feels like the real thing! Even though it’s made without whole wheat flour (typically used to make traditional roti), they’re still soft, flexible and totally delicious.
Gluten Free Roti Steps
In bite-sized steps:
Dough Prep
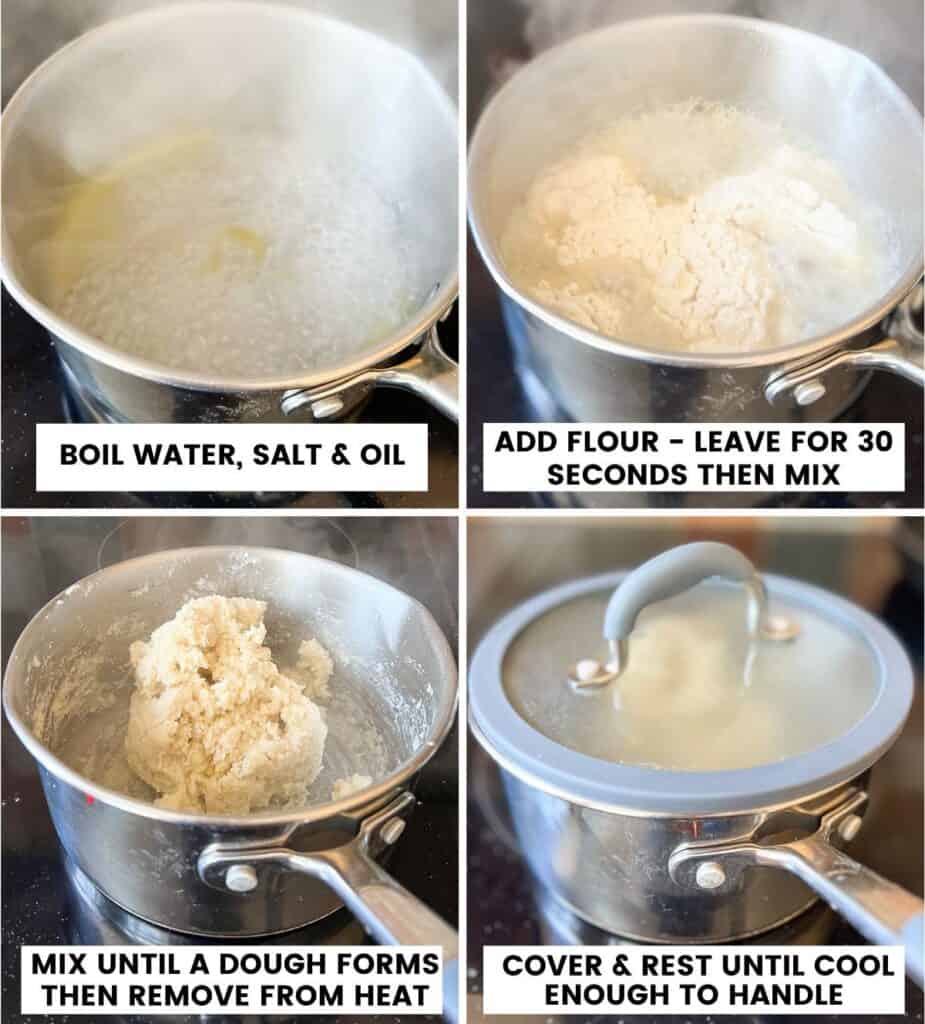
- In a small pot: add water, salt and oil.
- Bring to a boil.
- Reduce heat to low then add millet flour. Do not stir. Leave for 30-60 seconds without touching.
- Turn off heat and mix together until a thick dough clumps together.
- Remove from the heat. Cover with a fitted lid and leave 5-10 minutes.
Knead and Divide
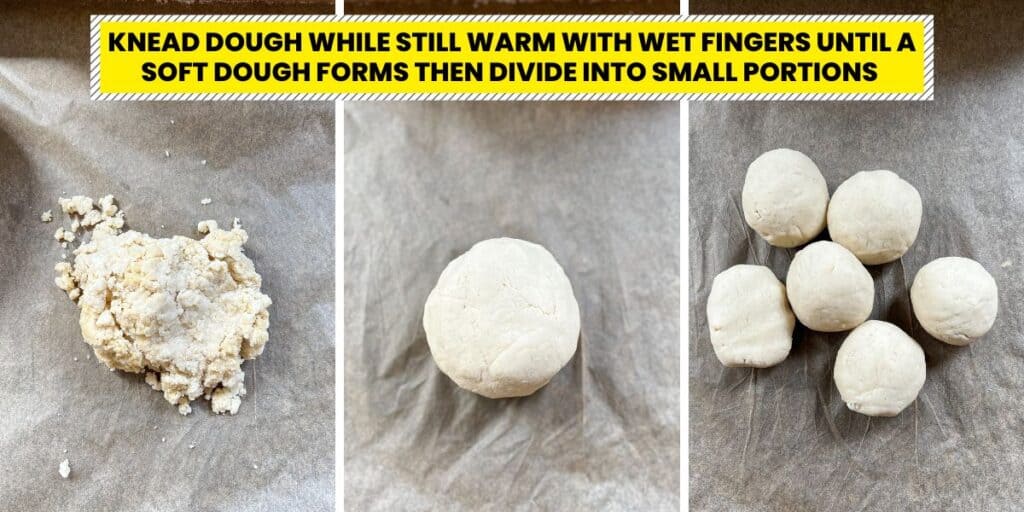
- Transfer the dough to a clean surface.
- With wet fingers, knead the dough about 5 minutes until you can form a smooth, soft ball.
- Divide into smaller portions to roll out.
Tip!
It’s much easier to knead while the dough is still a little hot. Just make sure it’s cool enough to handle comfortably.
Roll and Cook
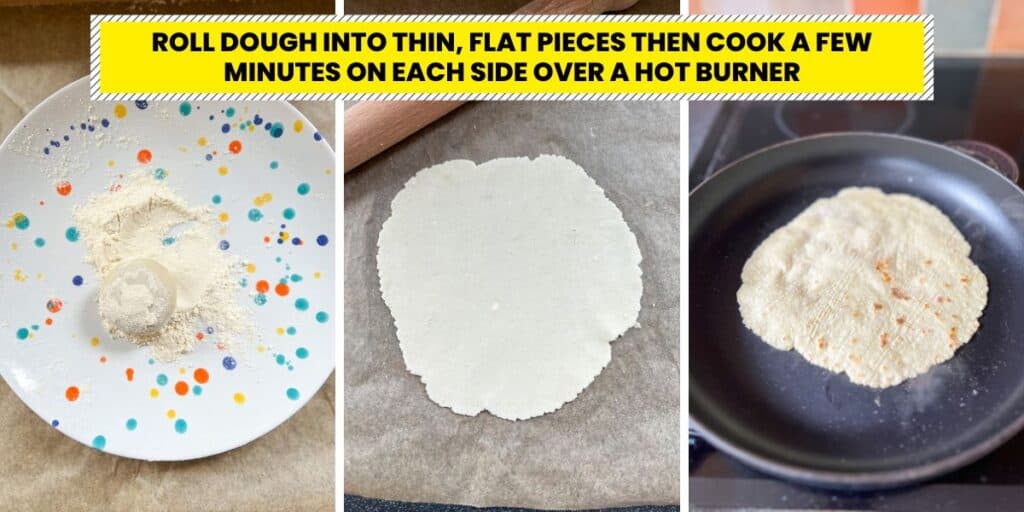
- Keep a small bowl or plate of flour nearby.
- Heat a large flat pan (non stick or well seasoned cast iron pan) over a medium or medium-hight heat.
- One a time: gently roll each dough ball in flour.
- On a large piece of parchment, roll out the dough until thin, flat and about 8 inches wide.
- Transfer to the hot pan. Cook on one side until you notice small bubbles forming over the top.
- Flip and repeat on the other side. If needed, cook each side again until you’re happy with the color.
- Transfer to a large plate and cover with a clean kitchen towel.
- Repeat until all dough portions have been cooked.
Tip!
Keep the dough balls covered in the pot used earlier until you’re ready to roll. This will help keep the dough from drying out too soon.
Quick Questions
A few questions you may have before you begin:
Why Mix The Flour In Boiling Water? Do I Have To?
I’ve seen this method come up in a few niche, gluten free recipes I’ve tried. It’s a question I’m still considering and one I’m looking forward to testing out more.
The idea is to achieve starch gelatinization: when water and starch are heated up to the point that the starch molecule swell up allowing the water to absorb more fully into the starch.
You see this happen when you make certain sauces and gravies that containing starch or starch heavy flours.
- Look to my Vegan Sun Dried Tomato Alfredo as an example. Instead of dairy, I use tapioca starch in a heated up sauce to thicken the consistency.
- This is also what happens with you boil pasta or noodles. Uncooked pasta and noodles are hard and firm until boiled. In water they swell up with water to become soft and tender.
By mixing the dough in hot water then leaving it sit unmoved for a bit, you give the millet flour chance to really hydrate. This makes for a finished gluten free roti that is soft and pliable and much easier to roll out.
Can I use a different flour?
If you’d like to make something with a different flour, I recommend you make one of my other gluten free flatbread recipes instead:
- Gluten Free Flatbread (Cassava Flour) – Quite similar to this recipe when finished.
- Chickpea Flour Flatbread – Similar to this gluten free roti, but not as flexible.
- Socca – Made with chickpea flour. Quite a different end result in taste and texture, but easy to make and great with dips.
- Gluten Free Manakish – Made with rice flour and tapioca flour. More like a pizza dough, but very satisfying! This recipe uses yeast so it it’s closer to a gluten free naan.
What’s the difference between roti and chapati?
Both roti and chapati are unleavened, tortilla-like flatbread made with whole-wheat flour. Unlike naan, they usually don’t contain yeast.
The main difference between the chapati and roti? To make chapati, you finish both sides with fat. So you cook the roti, brush some melted butter, ghee or oil across both sides, then cook once more to finish.
Feel free to turn your gluten free roti here into gluten free chapati! Melt some butter or oil with garlic and fresh herbs to brush over the top. It’s simple, easy and delicious!

Enjoy
Don’t forget to rate the recipe and leave a comment below if you try it out. I always appreciate the feedback – especially when you share what changes you may have made. It also helps future readers who are thinking of making the recipe!
Gluten Free Roti (Millet Flour)
They're soft, flexible and super easy to make! Make this roti recipe with only 4 simple ingredients.
Ingredients
- 1 cup warm water (240 ml)
- 1/2 teaspoon salt
- 1 tablespoon oil
- 1 cup millet flour (120 g)
Instructions
- Add water, salt and oil to a medium sauce pan. Set over a high heat and bring to a boil.
- Add millet flour to the boiling water. Leave for about 30 seconds. Turn off the heat then mix the flour into the water. Mix until a thick dough clumps together.
- Remove the pot from the heat and cover with a fitted lid. Leave, covered about 10 minutes or until the dough is comfortable enough to handle but still warm.
- Transfer the dough to a clean surface. Wet your fingers with a bit of water and begin kneading the dough. Knead for about 5 minutes until it's soft and smooth.
- Divide the dough into 6 portions (about 55 grams each).
- Lightly flour a large sheet of baking paper or silicone mat. With a rolling pin, one at a time roll the dough balls out on the lightly floured surface until flat and even (about 8 inches wide in diameter). Lightly add more flour to the dough as needed to keep it from sticking too much. Keep a small bowl of flour nearby to add more flour as you go if needed.
- Heat a large seasoned cast iron pan or non stick pan over a medium-high heat. When the pan is hot, carefully transfer the rolled out dough to the pan and let cook on each side for about 4-5 minutes. The flatbread should form small air pockets across the surface and turn lightly golden on one side.
- Repeat this process with the remaining dough until complete.
- Optional: After you add the roti to the pan, brush the top side with a little bit of oil. Once the bottom has cooked, flip over and repeat on the the other side.
Nutrition Information
Serving Size:
1 roti Calories: 96Total Fat: 3gSaturated Fat: 0gTrans Fat: 0gUnsaturated Fat: 3gCholesterol: 0mgSodium: 179mgCarbohydrates: 15gFiber: 1gSugar: 0gProtein: 2gShop this Post
As an Amazon Associate and member of other affiliate programs, I earn from qualifying purchases.








L says
I did not get a roti consistency. After the 10 minutes covered, my “dough” was like polenta. I added flour till it was kneedable and cooked, for curiosity, and got polenta-lile cakes.
Sarah Nevins says
Hi L, – sorry to hear these didn’t work out for you!
It sounds like the problem may have potentially been a couple different things.
My first guess would be that there wasn’t quite enough flour. I understand that you added more flour to make it kneadable, but it may have been added too late to make a difference. If additional flour was added to a sticky dough that had already soaked up the water, it wouldn’t have gotten a chance to cook/ the starches in the flour to gelatinize which is necessary for making a soft and pliable roti.
The other potential issue, is that the dough may have needed a bit longer to mix and cook. If it just wasn’t forming into anything thicker than polenta after a couple of minutes then you were probably right with your assumption that it needed more flour.
najmeerh says
nice work i love it
Sarah Nevins says
Thanks – so glad you enjoyed it!