These Vanilla & Almond Mushroom Cookies are made from a simple gluten free sugar cookie recipe. The cookie dough is shaped then baked into cute little mushrooms parts, then dipped and decorated like fairytale flora.
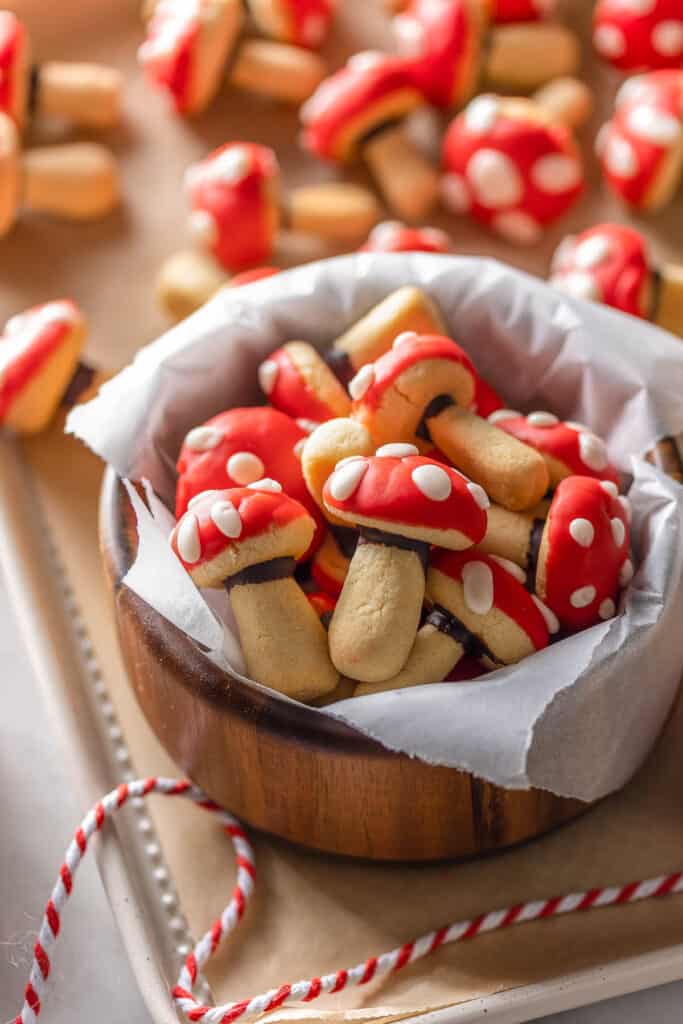
These aren’t your average Christmas cookie, but just as enjoyable and wonderfully whimsical!
🍄Almond Mushroom Cookies🍄
A few things to love about these mushroom-shaped cookies:
- Grain Free: The original recipe for these cookies comes from my Almond Flour Sugar Cookie recipe. It’s a naturally gluten and grain free thanks to the almond flour and coconut flour combo. You can also easily make it dairy free too!
- Easy to Make: The dough comes together quickly and easily in no time. It’s not super sticky either so you can easily shape and bake without chilling the dough first.
- Fun & Unique: These cookies are super cute and eye-catching! Use them as extra decoration for a Holiday Yule Log cake or enjoy them all on their own just for fun
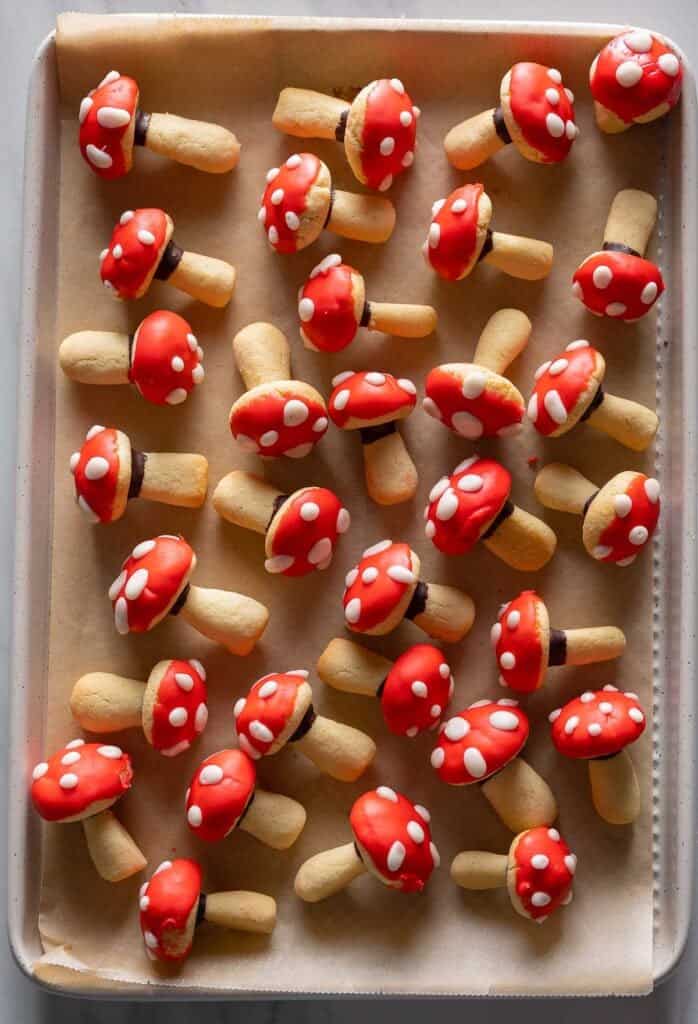
How to Make Mushroom Sugar Cookies
Despite their colorful and creative look, these cookies are actually pretty easy to make! The entire process breaks down into a few simple steps:
- Make the cookie dough.
- Shape and bake the dough into stems and caps.
- Attach the stems to the cookie caps with melted chocolate.
- Dip and decorate with the red and white vanilla icing.
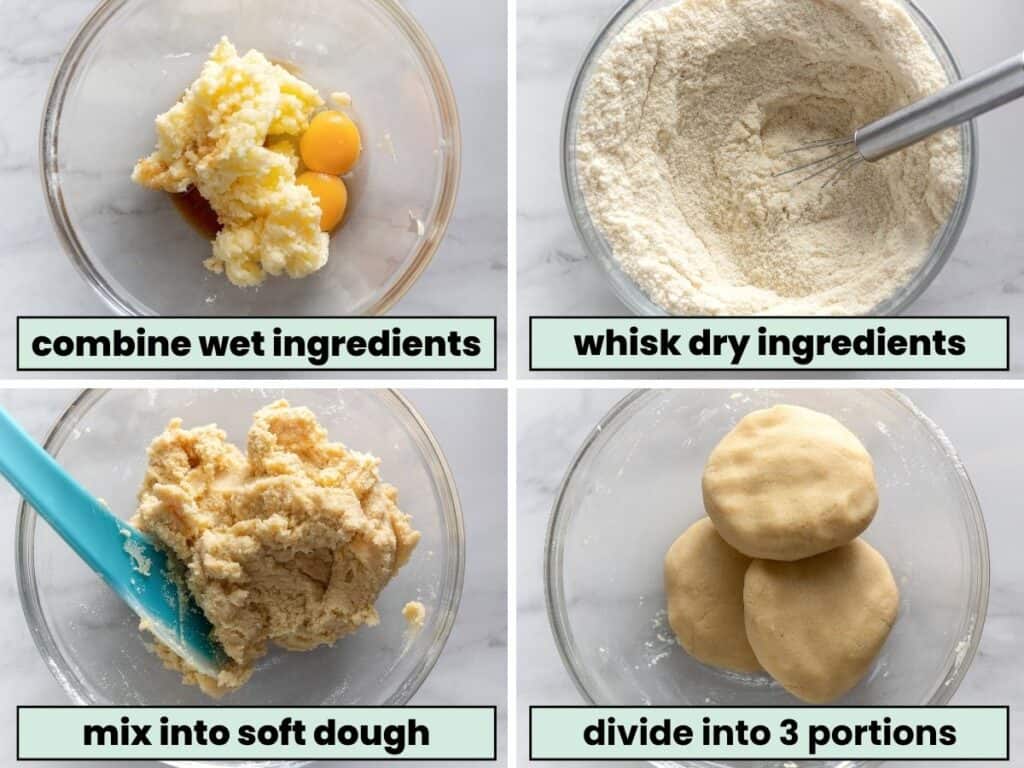
Cookie Dough
- Cream the butter and sugar on high then mix in the egg, yolk and vanilla extract.
- In a different bowl whisk the dry ingredients until well combined.
- Mix until a thick, soft dough forms. Scrape down the side of the bowl as needed.
- Divide the dough into 3 equal parts: 1 part for the stems and 2 parts for the caps.
Shape & Bake
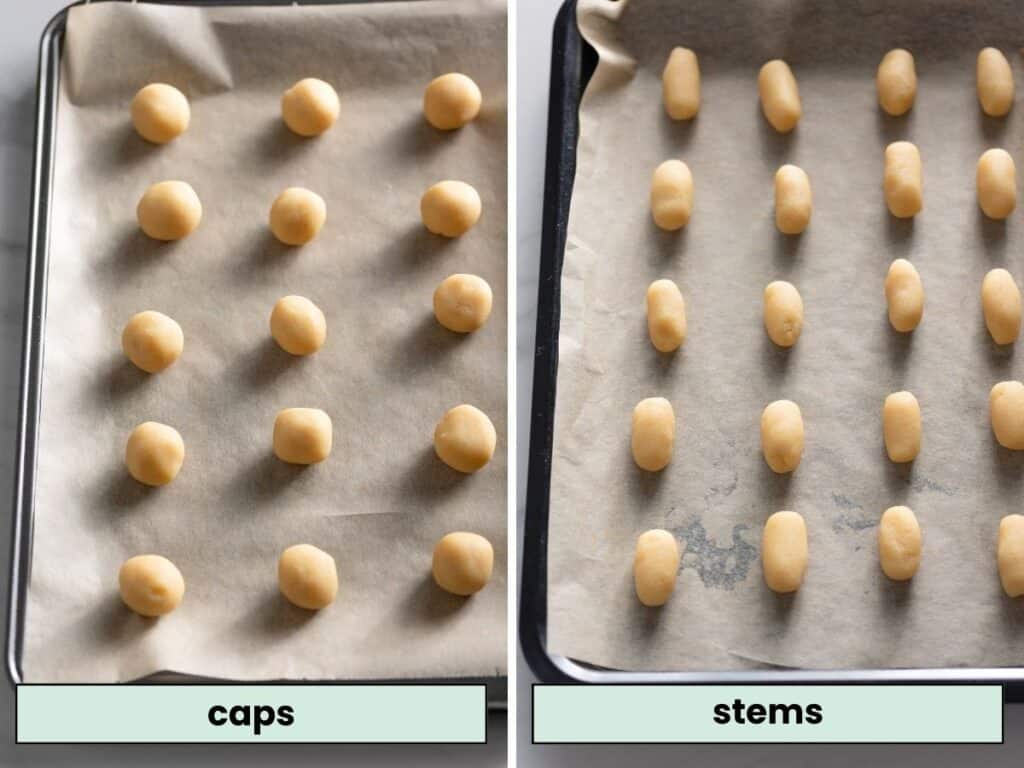
- Mushroom Cookie Caps: Divide portions into about 30 small pieces and roll into little balls.
- Flatten slightly after placing on the baking sheet to encourage the cookies to bake into a domed shape.
- Bake about 12-15 minutes.
- Mushroom Cookie Stems: Divide the remaining 1/3 portion of dough into 30 pieces (or a number equal to the mushroom caps) and roll into long stem shapes.
- Each stem should be about 2-2.cm long. Make one end thick for the base and taper the other end into a narrow shape for the top of the stem.
- Bake about 10-12 minutes.
- Cool: Let the cookies rest on the baking sheet about 5 minutes then move to a wired rack to finish cooling.
Create Mushroom Shape
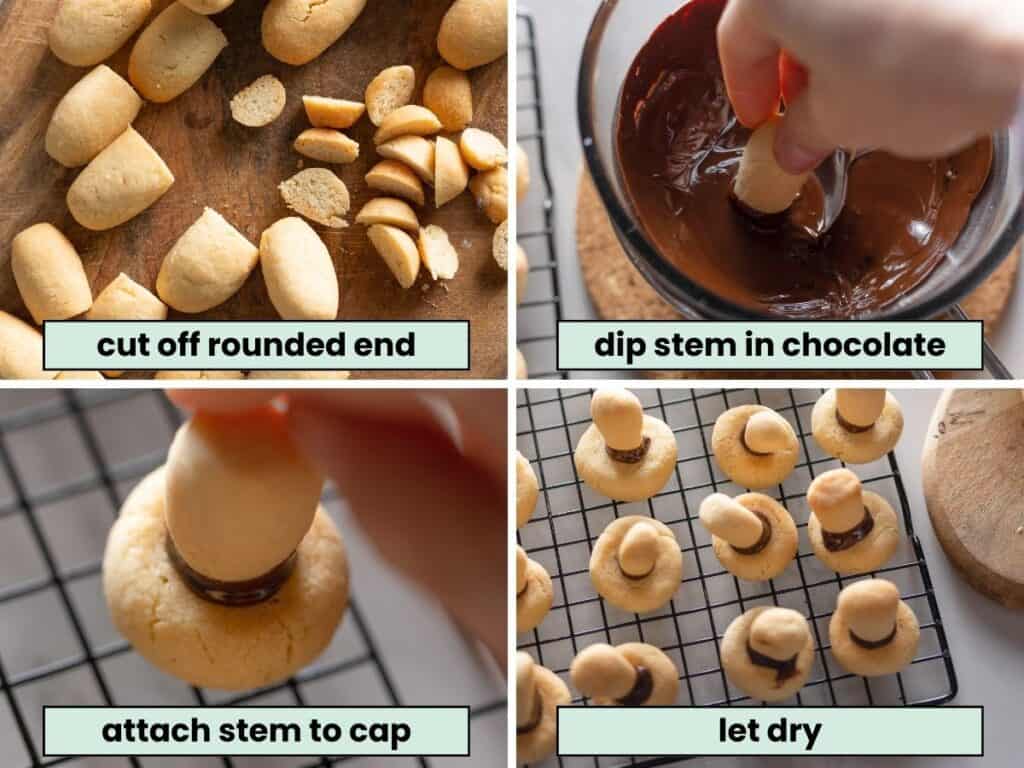
- Cut off the narrowed/tapered end of each mushroom stem. The flat surface makes it easier to attach the stem the cap.
- Dip the cut off ends of the cookie stems into a bowl of melted chocolate then press into the bottom of a mushroom cap to create the mushroom shape.
- Set aside and let the chocolate fully dry.
Tip!
Let the melted chocolate cool to room temperature before dipping. The chocolate will set quicker as it cools. If you try to do this part too soon the stems won’t stick as easily to the caps.
Decorate
- Whisk together the icing in a small bowl.
- Before you add any food color – scoop out a few spoonfuls of the glaze to use as the white spots. Transfer to a small piping bag or small sandwich bag and set aside.
- Add the food coloring to the main glaze. Add a drop or two (or more if needed) to get the desired color.
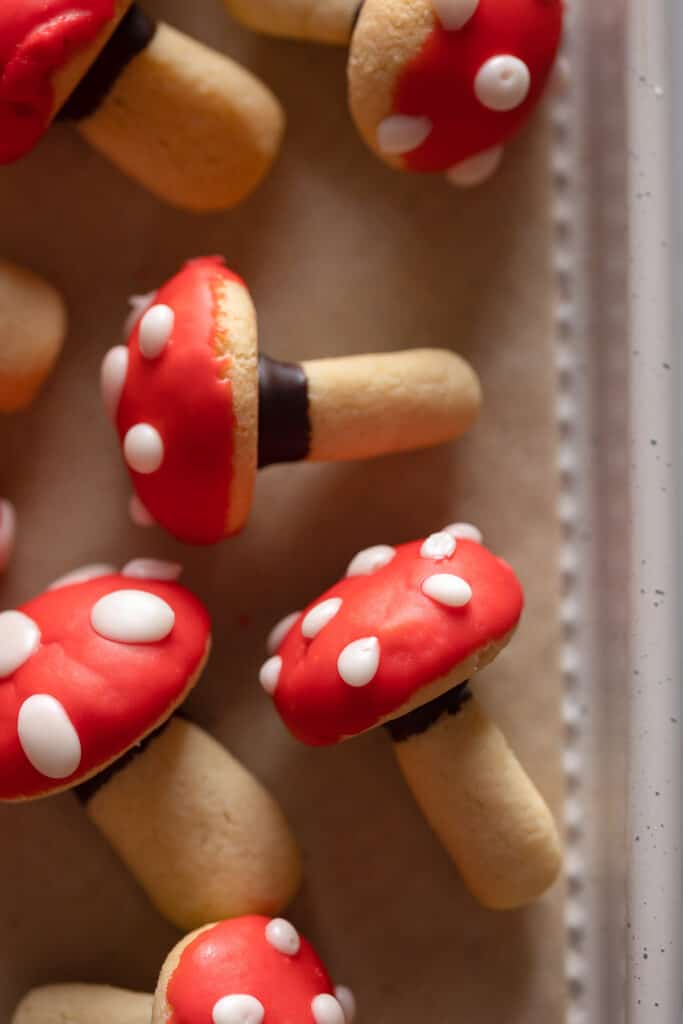
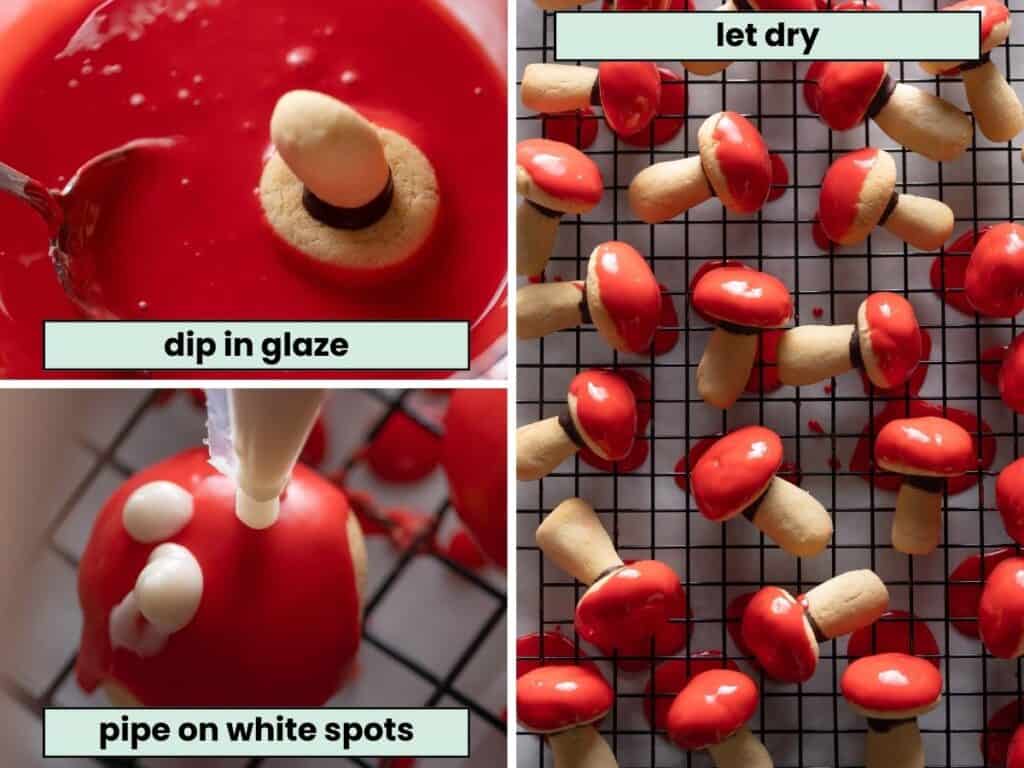
- Carefully dip the mushroom caps in the glaze. Let the excess icing drip back into the bowl then place the cookies back on the wire rack to drip dry.
- After the glaze has set, pipe a few small white dots across the caps. Set aside once more to dry and that’s it.
Variations & Additions
- Leave unfrosted: Skip the red glaze and leave the mushrooms unfrosted to look like little button mushrooms.
- Use White Chocolate: Instead of whisking up a powdered sugar glaze, melt some white chocolate to glaze the cookies instead. Color the chocolate with food coloring or red candy melted.
- Make sure to use a food coloring that’s suitable for chocolate. Powder, gel and oil based food coloring is best. Water based food coloring with cause the chocolate to seize up and become gritty.
- Sliced almonds: Instead of piping on the white spots, sprinkle a few slices almonds over the mushroom caps while the glaze is still wet.
Enjoy!
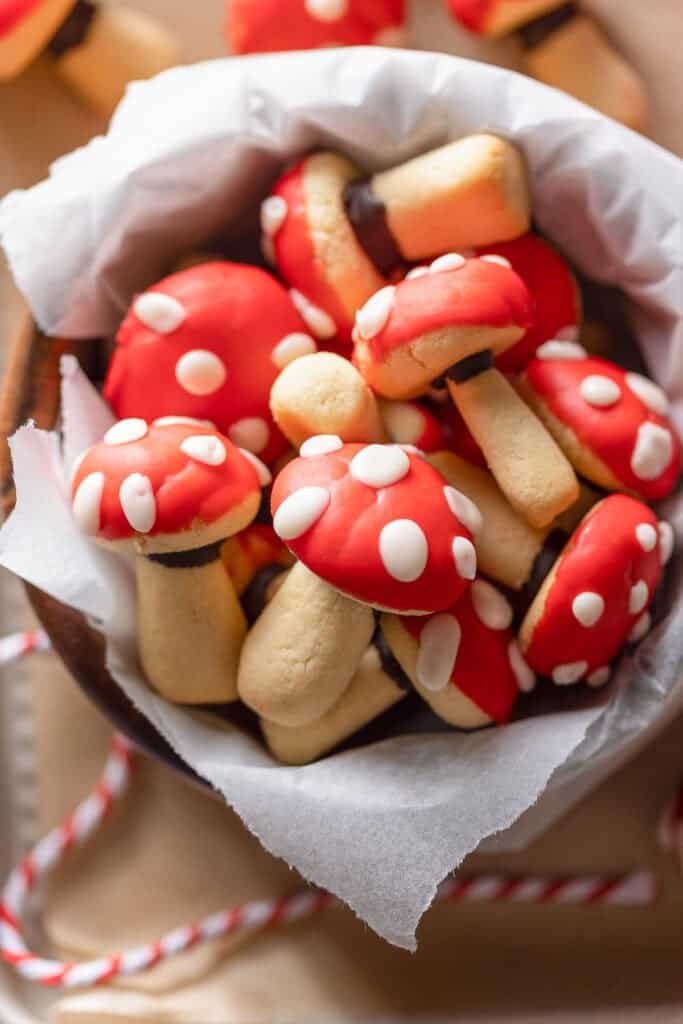
Let me know if you try this Almond Mushroom Cookies recipe! Leave a comment and review with your thoughts. I always appreciate the feedback and serving suggestions that you come up with!
More Gluten Free Christmas Cookie Recipes
- Buttered Pecan Meltaways With Almond Flour (Snowball Cookies)
- Rosemary Lemon Christmas Tree Cookies
- Gluten Free Gingerbread Cookies – Vegan Option (No Chill)
- Paleo Red Velvet Cookies
- Paleo Gingerbread Cookies
- Gluten Free Peanut Butter Cookies
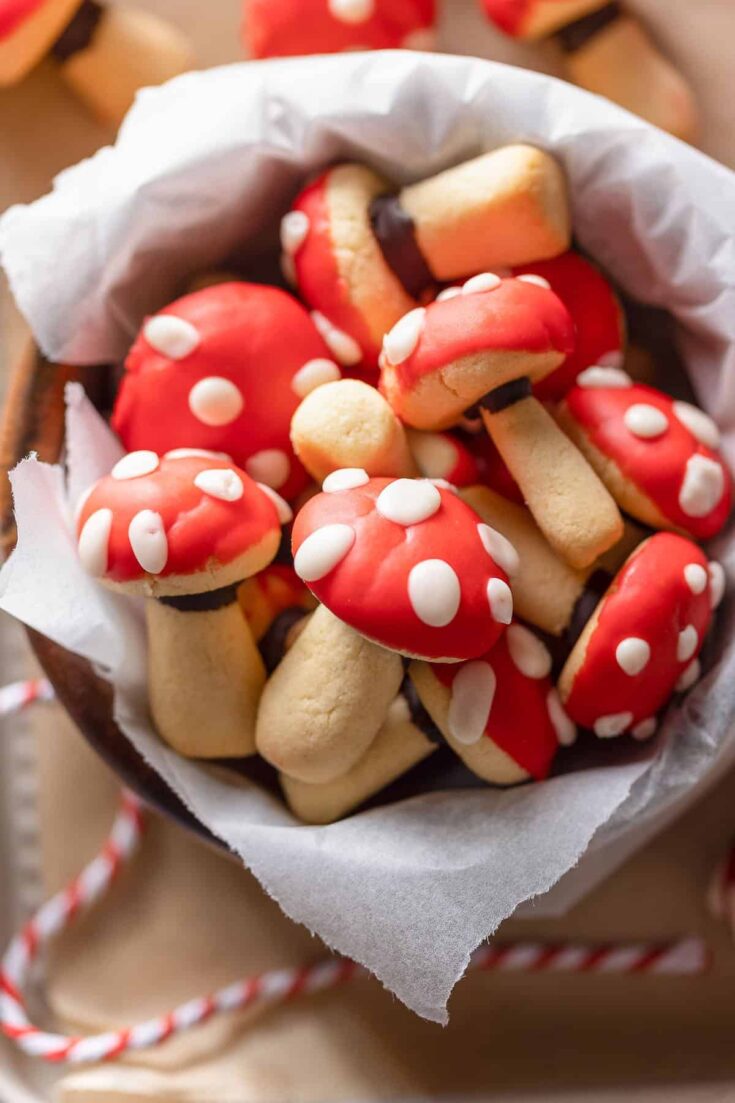
Vanilla & Almond Mushroom Cookies
Made from a simple gluten free sugar cookie recipe - the dough is shaped, baked and decorated like fairytale flora.
Ingredients
Cookies
- 1/2 cup unsalted butter vegan butter, softened to room temperature (113)*
- 3/4 cup white caster sugar (150g)
- 2 tsp vanilla extract (10ml)
- 1 egg + 1 egg yolk
- 2 3/4 cups almond flour (265g)
- 1/3 cup coconut flour (40g)
- 1/2 tsp baking powder
- 1/2 tsp salt
Mushroom Decorations
- 2/3 cup chocolate chips or chopped chocolate (113g | 4 oz)
- 2 cup confectioners’ sugar (250g)
- 1 tsp vanilla extract
- 1/4 tsp almond extract (optional)
- 2 tbsp water (or more if needed)
- red food coloring as needed
Instructions
Bake Cookies
- Oven Prep: Line a couple of large baking sheets with parchment paper or lightly grease. Preheat oven to 350°F/180°C.
- Wet Ingredients: In a large bowl, with an electric mixer or in a stand mixer bowl with the paddle attachment, beat together the butter and sugar on high until smooth and creamy - about 2 minutes. Add the egg, egg yolk and vanilla extract. Beat another 1 minute.
- Dry Ingredients: In a medium bowl whisk together the almond flour, coconut flour, baking powder and salt until combined. Add the flour mixture to the wet ingredients and mix on a low speed until a soft dough forms.
- Divide Dough: Divide the dough into 3 equal portions: ⅓ of the dough will be for making the mushroom stem and the ⅔ remaining dough is for the mushroom caps.
- Shape Mushroom Caps: Combine the ⅔ dough portions into one big portion then divide into 30 smaller pieces (about 10-15 grams each). Roll into small balls then place on the prepared baking sheet. Gently press down on each dough ball to flatten the cookies slightly so they bake into a dome shape. The cookies won't spread much in the oven so feel free to fit as many as you can on one tray, but try to leave an inch in between each dough ball.
- Bake Caps: Place the baking sheet in the middle of the oven and bake for 12-15 minutes until the cookies are slightly puffed up and golden brown around the edges. Remove from oven and let cool about 5 minutes on the cookie sheet then transfer to wire rack to finish cooling.
- Shape Stems: While the mushroom caps bake, divide the remaining ⅓ into 30 pieces (if you ended up with a slightly different number of mushroom caps, make an equal amount of stems). Shape the remaining dough into stem-like shapes, about 2-2.5 cm long. Make one end slightly thicker for the mushroom base and the other end slightly tapered to attach to the mushroom cap. Place each stem on a prepared baking sheet. Leave about 1 inch in between each stem. Set aside.
- Bake Stems: Place the mushroom stems in the middle of the oven for 10-12 minutes until slightly puffed and golden. Remove and let cool on the baking sheet a few minutes before transferring to a wire rack to finish cooling.
Assemble & Decorate
- Melt chocolate in a heatproof bowl on a medium power for 30 second intervals until melted. Set aside to let cool to room temperature. The cooler the chocolate is the faster it will set.
- Start with the cooled mushroom stems. Carefully cut off the top part of the tapered end of the stem. Dip the cut end of the stem in the melted chocolate then stick to the bottom of a mushroom cap to attach. Let the cookies cool cap side down until the chocolate fully dries/sets.
- Make the vanilla glaze: In another small bowl whisk together the confectioners sugar, vanilla extract, almond extract and water into a smooth glaze. If the. glaze is too thick, add another teaspoon of water until you get the desired consistency. If it's too thin, add more icing sugar as needed.
- Transfer a few spoonfuls of the icing to a piping bag or a small ziplock bag and set aside (for the white spots). In the bowl with the remaining icing, add a drop or two of food coloring and mix until fully combined. Optional: Whisk an extra tablespoon of icing sugar into white icing to create a thicker glaze. It will dry faster and the spots will spread less as it sets.
- Dip each mushroom cap in the red icing. Let excess glaze drip off into the bowl, then place the cookies back on the wired rack to drip dry (about 10-20 minutes)
- After the glaze has dried, begin piping small white icing dots on the caps to make the mushroom spots. If using a ziplock bag, snip a small hole into the bottom corner of the bag for piping. Set aside to let dry (about 10-20 minutes).
- Once full set/dry, transfer to an airtight container, store up to 4 days and enjoy!
Notes
- Make it Dairy Free: Use a block of vegan/dairy free butter and not the spreadable butter that comes in a tub. My go-to vegan butter for baking is Flora Plant Butter.
- Icing/Chocolate: Instead of an icing sugar glaze you can use melted white chocolate (250g | 9oz) with an oil/gel/powdered based red food coloring (no water based food coloring for chocolate).



Leave a Review!